Headless CMS: Enable In-Context Preview and Editing in an External Application

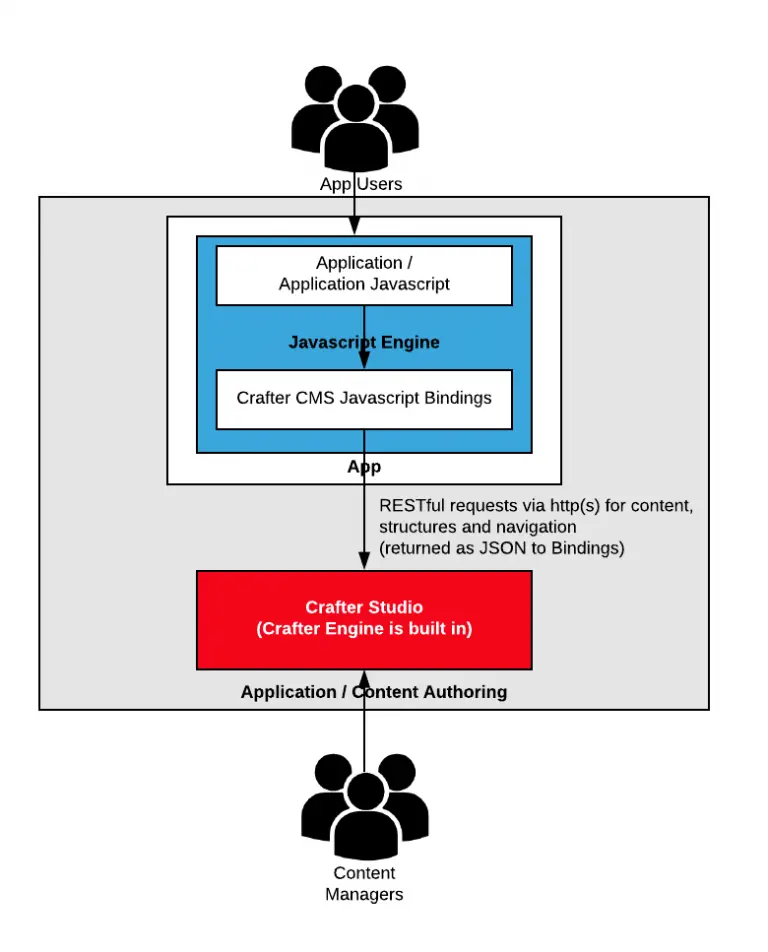
Do you have an existing application that has content in it that you want to manage but you don’t want to completely rebuild in a CMS? This use case is more common than you can imagine. Developers start building an application only much later to find it would benefit from CMS authoring capabilities like in-context editing and preview. What’s the solution? Rebuild the application? No. CrafterCMS is a headless CMS that’s front-end agnostic. It can plug into any application.
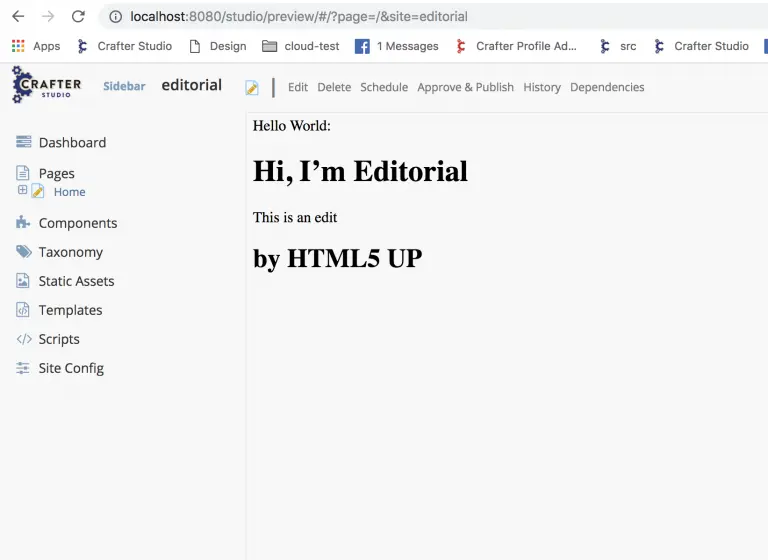
Let’s look at a very simple example. Just recently I posted a blog that used Node JS an external application that called CrafterCMS headless CMS capabilities for content via APIs.
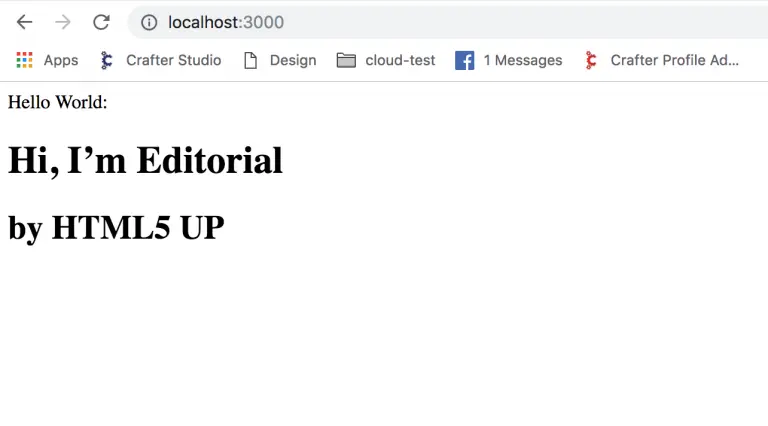
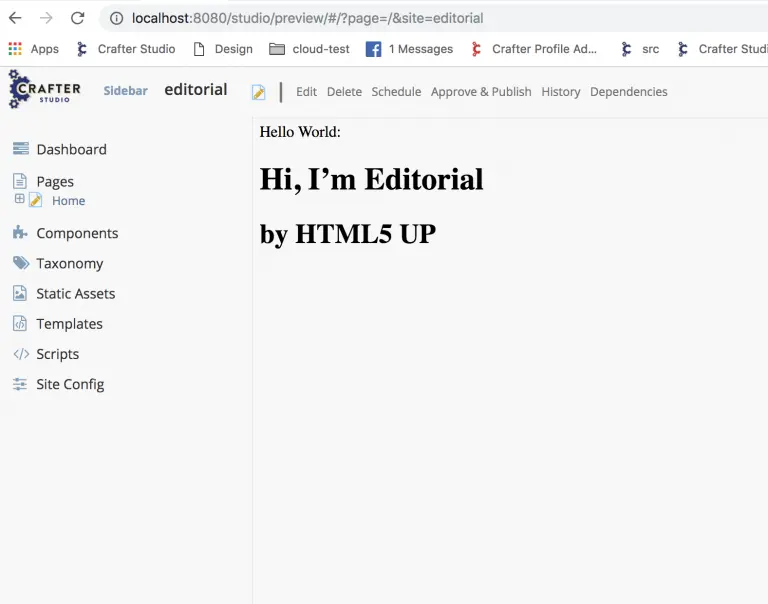
In the screenshot above the content “Hi, I’m Editorial by HTML5 UP” is being served to the NodeJS application via APIs.
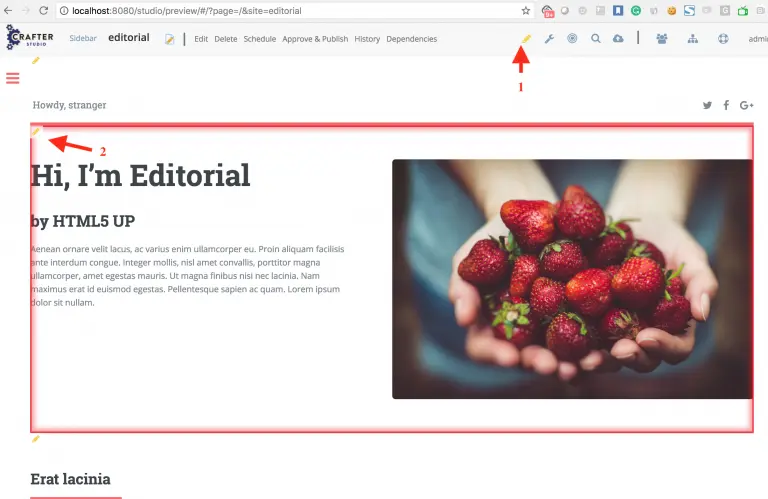
Content authors are used to working with in-context editing and preview as seen below:
In this blog, I’ll extend the example above to show how to enable those features for your content authors. The techniques shown in this blog are applicable to any web-based front-end technology. CrafterCMS provides additional help for specific frameworks like React JS. These are/will be covered in other blogs.
Getting Started
Follow the instructions in this blog to get an external application that pulls editable content from CrafterCMS via API. If you prefer to work the browser rather than Node JS, here is another exampleof a simple application that runs entirely in the browser. For this blog, I’ll use the Node JS example.
Once you have completed this step you should be able to:
- Make a change to the hero text in the editorial website via Crafter Studio
- See the change in your external application running in Node JS
Enabling Preview
The next step is to enable preview for content authors so they can see how the content will look in the external application. To keep things simple in our example I will change the Editorial site to preview the external application. In some cases, you may wish to leave the Editorial site/authoring experience as is and create a new project for the External app. Let’s keep to the basics.
Step 1: Configure the Site Preview
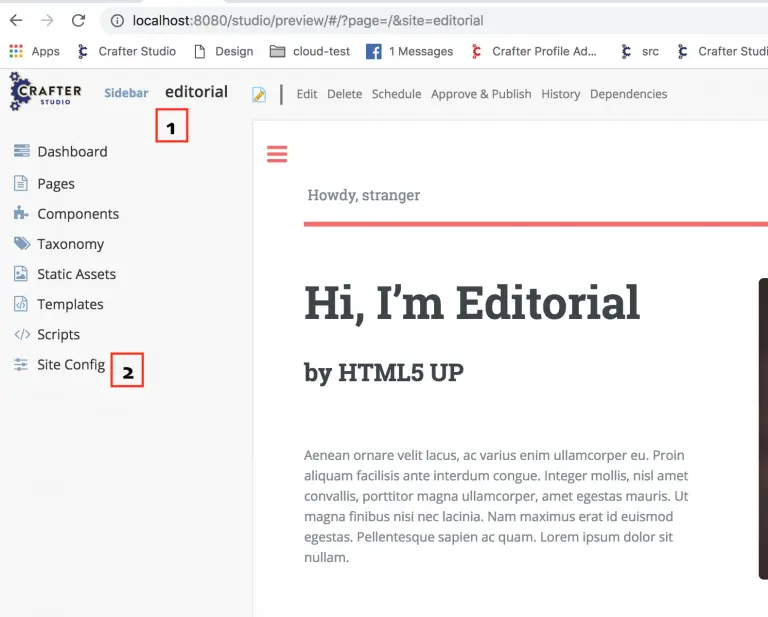
- In the Editorial site, click on the Sidebar to open the Sidebar menu.
- Click Site Config to go to site administration.
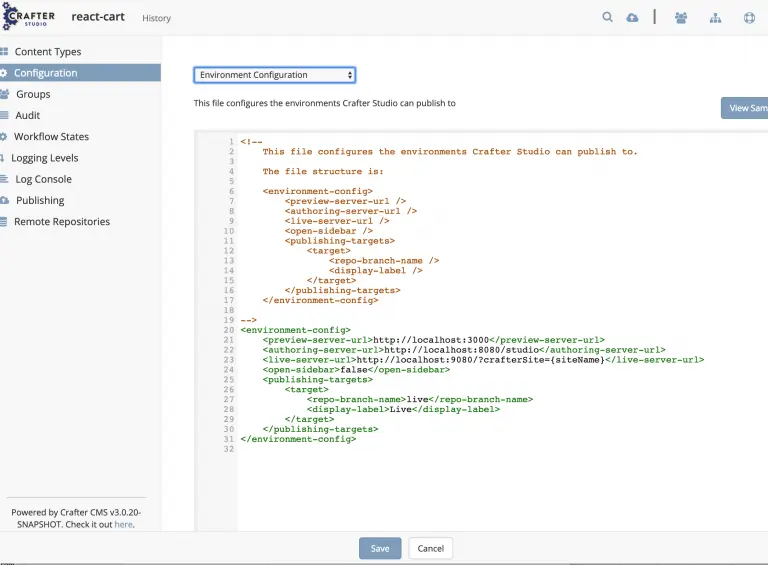
- On the Site Config console, click Configuration, then choose Environment Configuration from the drop-down.
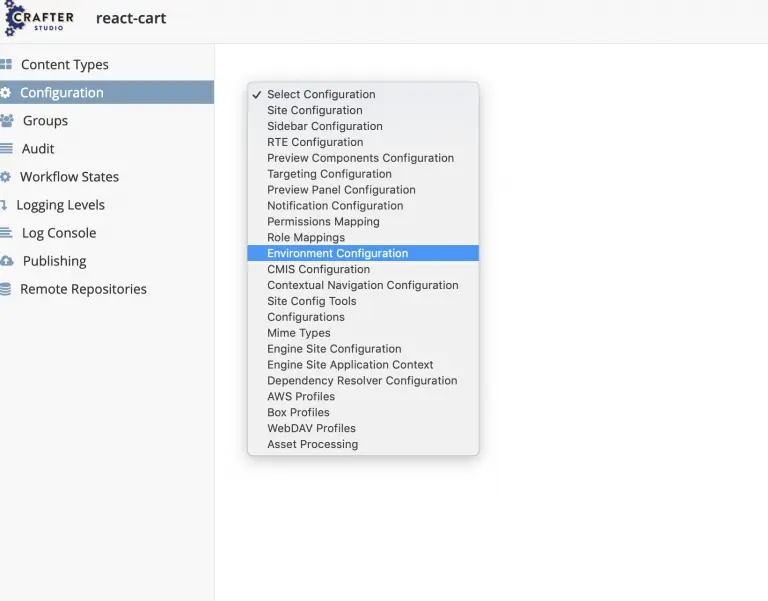
- Add the following line to the XML in the location shown and click Save.
http://localhost:3000
- Click the Crafter logo to return to the content authoring for the site.
- Go to preview for the home page and you will see your Node JS application showing in preview.
With the configuration made, Crafter Studio now looks to the external application for its preview. As long as the external application is pointing to APIs running the Crafter Engine supporting preview you will be able to make edits and see them in the preview.
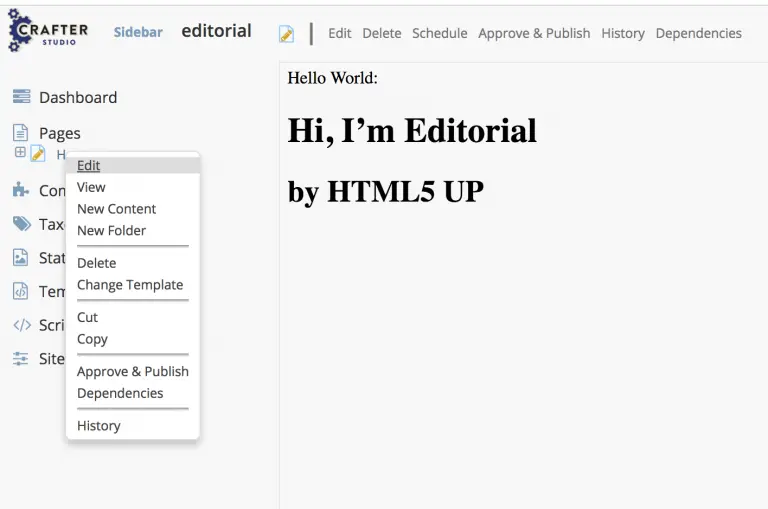
Enabling In-Context Editing
Crafter Studio makes it easy to get to the content you want to edit. The Sidebar, Dashboard and other UI elements make navigating to the content quick and easy. In-Context Editing is the ability to click on elements in your preview, edit them and see the change. This is a much more visual way of locating and editing content because its location in the information architecture doesn’t matter.

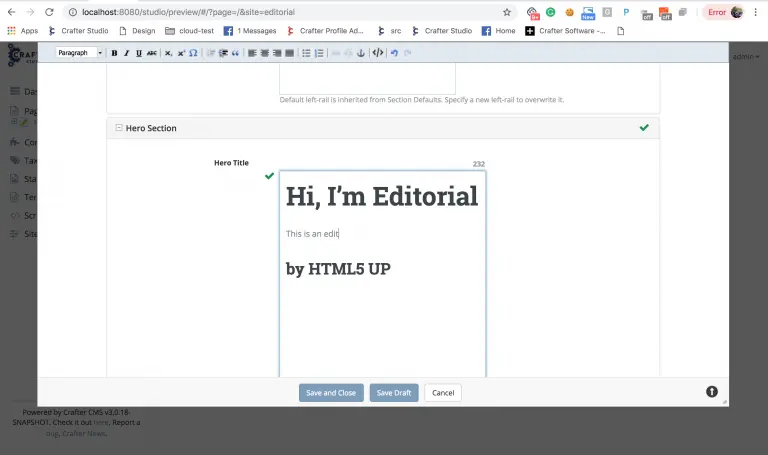
In Crafter Studio you turn on in-context editing by clicking on the pencil in the toolbar at the top of the screen. This enables pencils throughout your preview that allows you to edit the related elements directly as shown in the picture above.
In-Context editing is an integration with Crafter Studio, there’s a collaboration of sorts between the Studio application and the site/application being previewed that enables the in-context editing features like pencils and drag and drop. In this blog, we’re going to show a simple, framework agnostic way to support this integration. CrafterCMS has additional libraries for specific frameworks like React JS, Angular, Freemarker etc that encapsulate many of these details.
Step 1: Enable Communication
To enable communication between your application preview and Crafter Studio you must include a tiny piece of Javascript we call the “Guest” library.
To do this add the following include to the bottom of your page
In our Node JS example, we’re going to edit directly through the application. To enable this, add the following to your package.json:
“proxy”: {
“/api”: { “target”: “http://localhost:8080” },
“/studio”: { “target”: “http://localhost:8080” },
“/static-assets”: { “target”: “http://localhost:8080” }
},
Step 2: Indicate Where the In-context Editing Regions “Pencils” Belong
To enable point and click editing on content you must indicate where the regions are and what content the regions relate to. To do this in HTML5 applications Crafter Studio (and the Guest library) uses HTML5 attributes.
The following attributes are used:
- data-studio-ice: This property marks the element as the container for in-context editing. No value is required.
- data-studio-component-path: This is the path of the content object. Example: “/site/products/a-component.xml”
- data-studio-ice-path: This is the path of the content object. Example: “/site/products/a-component.xml”
- data-studio-component: This is the content type name. Example: “/component/product”
Example Container element:
data-studio-component=”/component/product”
data-studio-ice=””
data-studio-ice-path=”/site/products/a-component.xml”>
INNER HTML
Step 3: Try it!
Once you have marked elements in the application with the proper metadata you are ready to begin editing.
- Log in to Crafter Studio (for our example: http://localhost:3000/studio)
- Go to the preview for the application
- Turn on in-context editing by clicking on the pencil icon in the main navigation menu.


- Click the pencils and start editing? It’s as easy as that.
Conclusion
Many times developers want to content enable an application that is external to their CMS. Either the application was built before it needed CMS features or the developers built outside a CMS to avoid being constrained by traditional CMS frameworks. Headless CMS platforms are Content / API first CMS architectures that loosely couple your application to the CMS. This new architecture has enabled a host of new content managed channels including native mobile apps and new user-friendly app frameworks like ReactJS and AngularJS. The problem is that almost no CMS out there supports preview and editing of the applications and channels that pull content from them. Here CrafterCMS is different. CrafterCMS has always been decoupled and its architecture has always been agnostic to the frontend. CrafterCMS is a headless CMS that supports the authoring experience your content authors are accustomed to.