Setup CrafterCMS Authoring Using Crafter's AWS AMI
Step 1: Launch an AWS EC2 instance using a CrafterCMS Authoring AMI
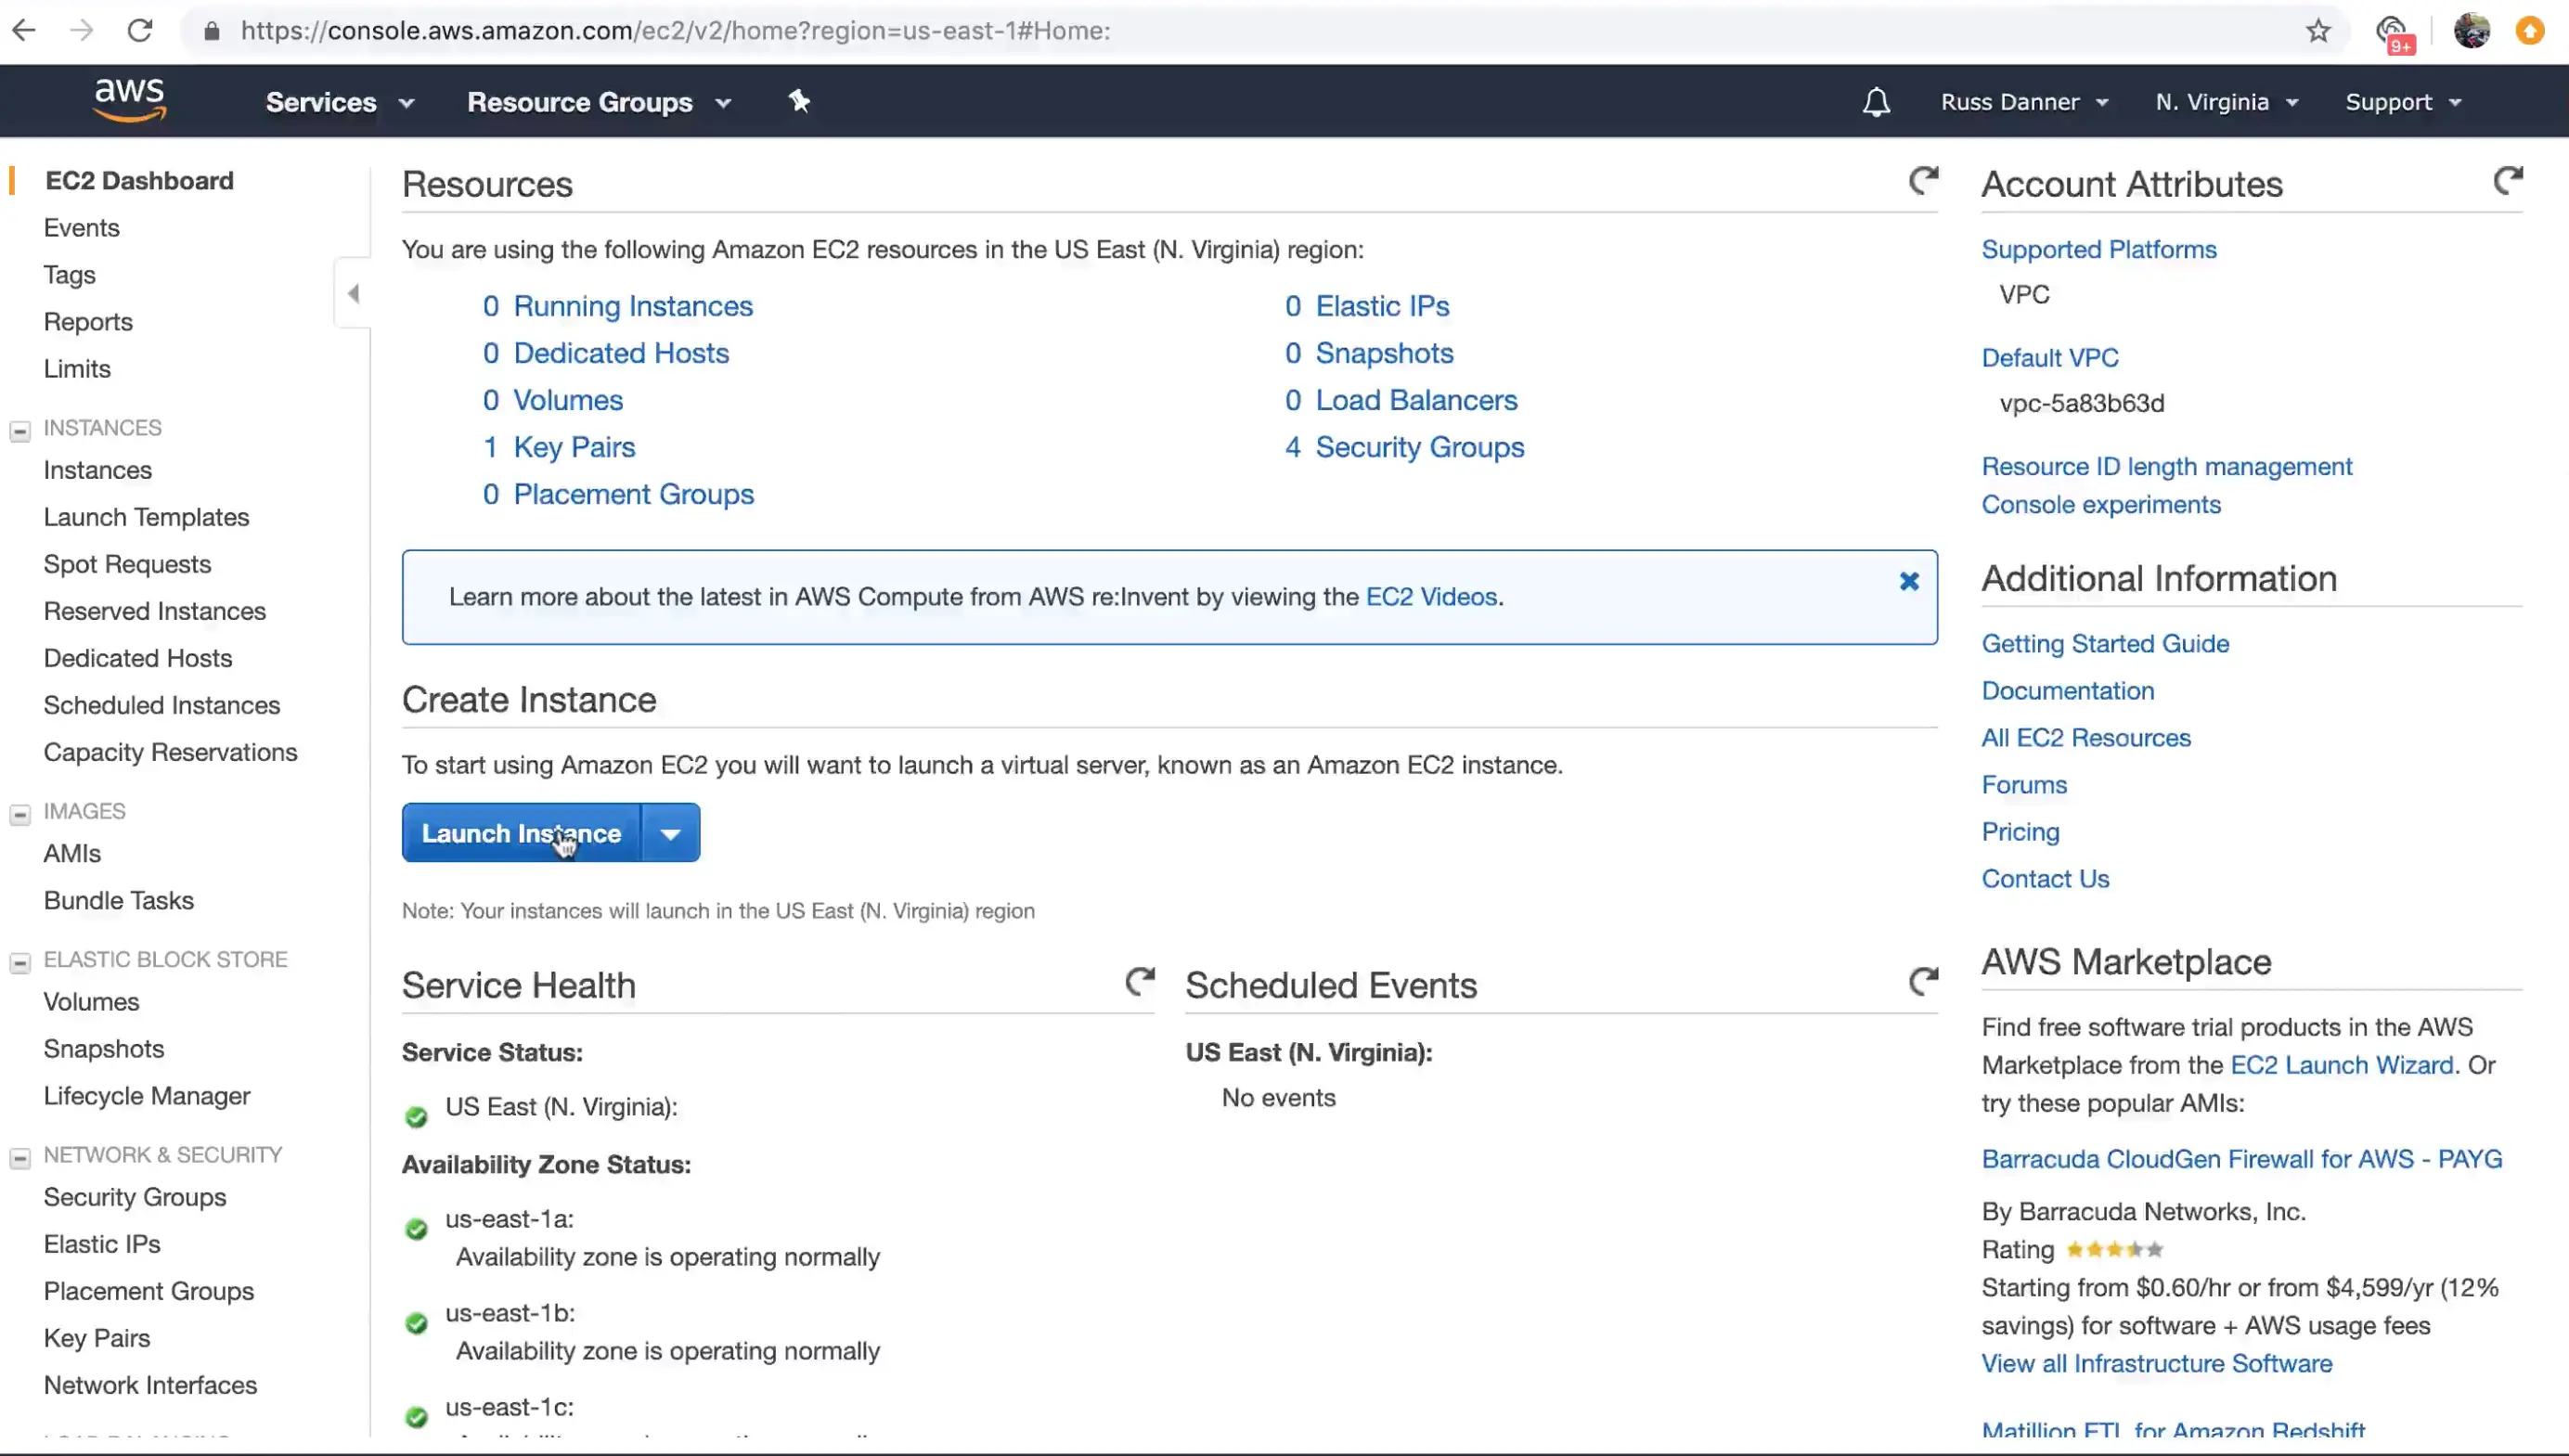
Crafter provides a prebuilt AMI(s) for Crafter Studio, the authoring component of CrafterCMS. In this step we'll walk you through the initial launch of your instance. To get started, go to your EC2 dashboard and click "Launch Instance." AWS will prompt you to choose your AMI type/image.
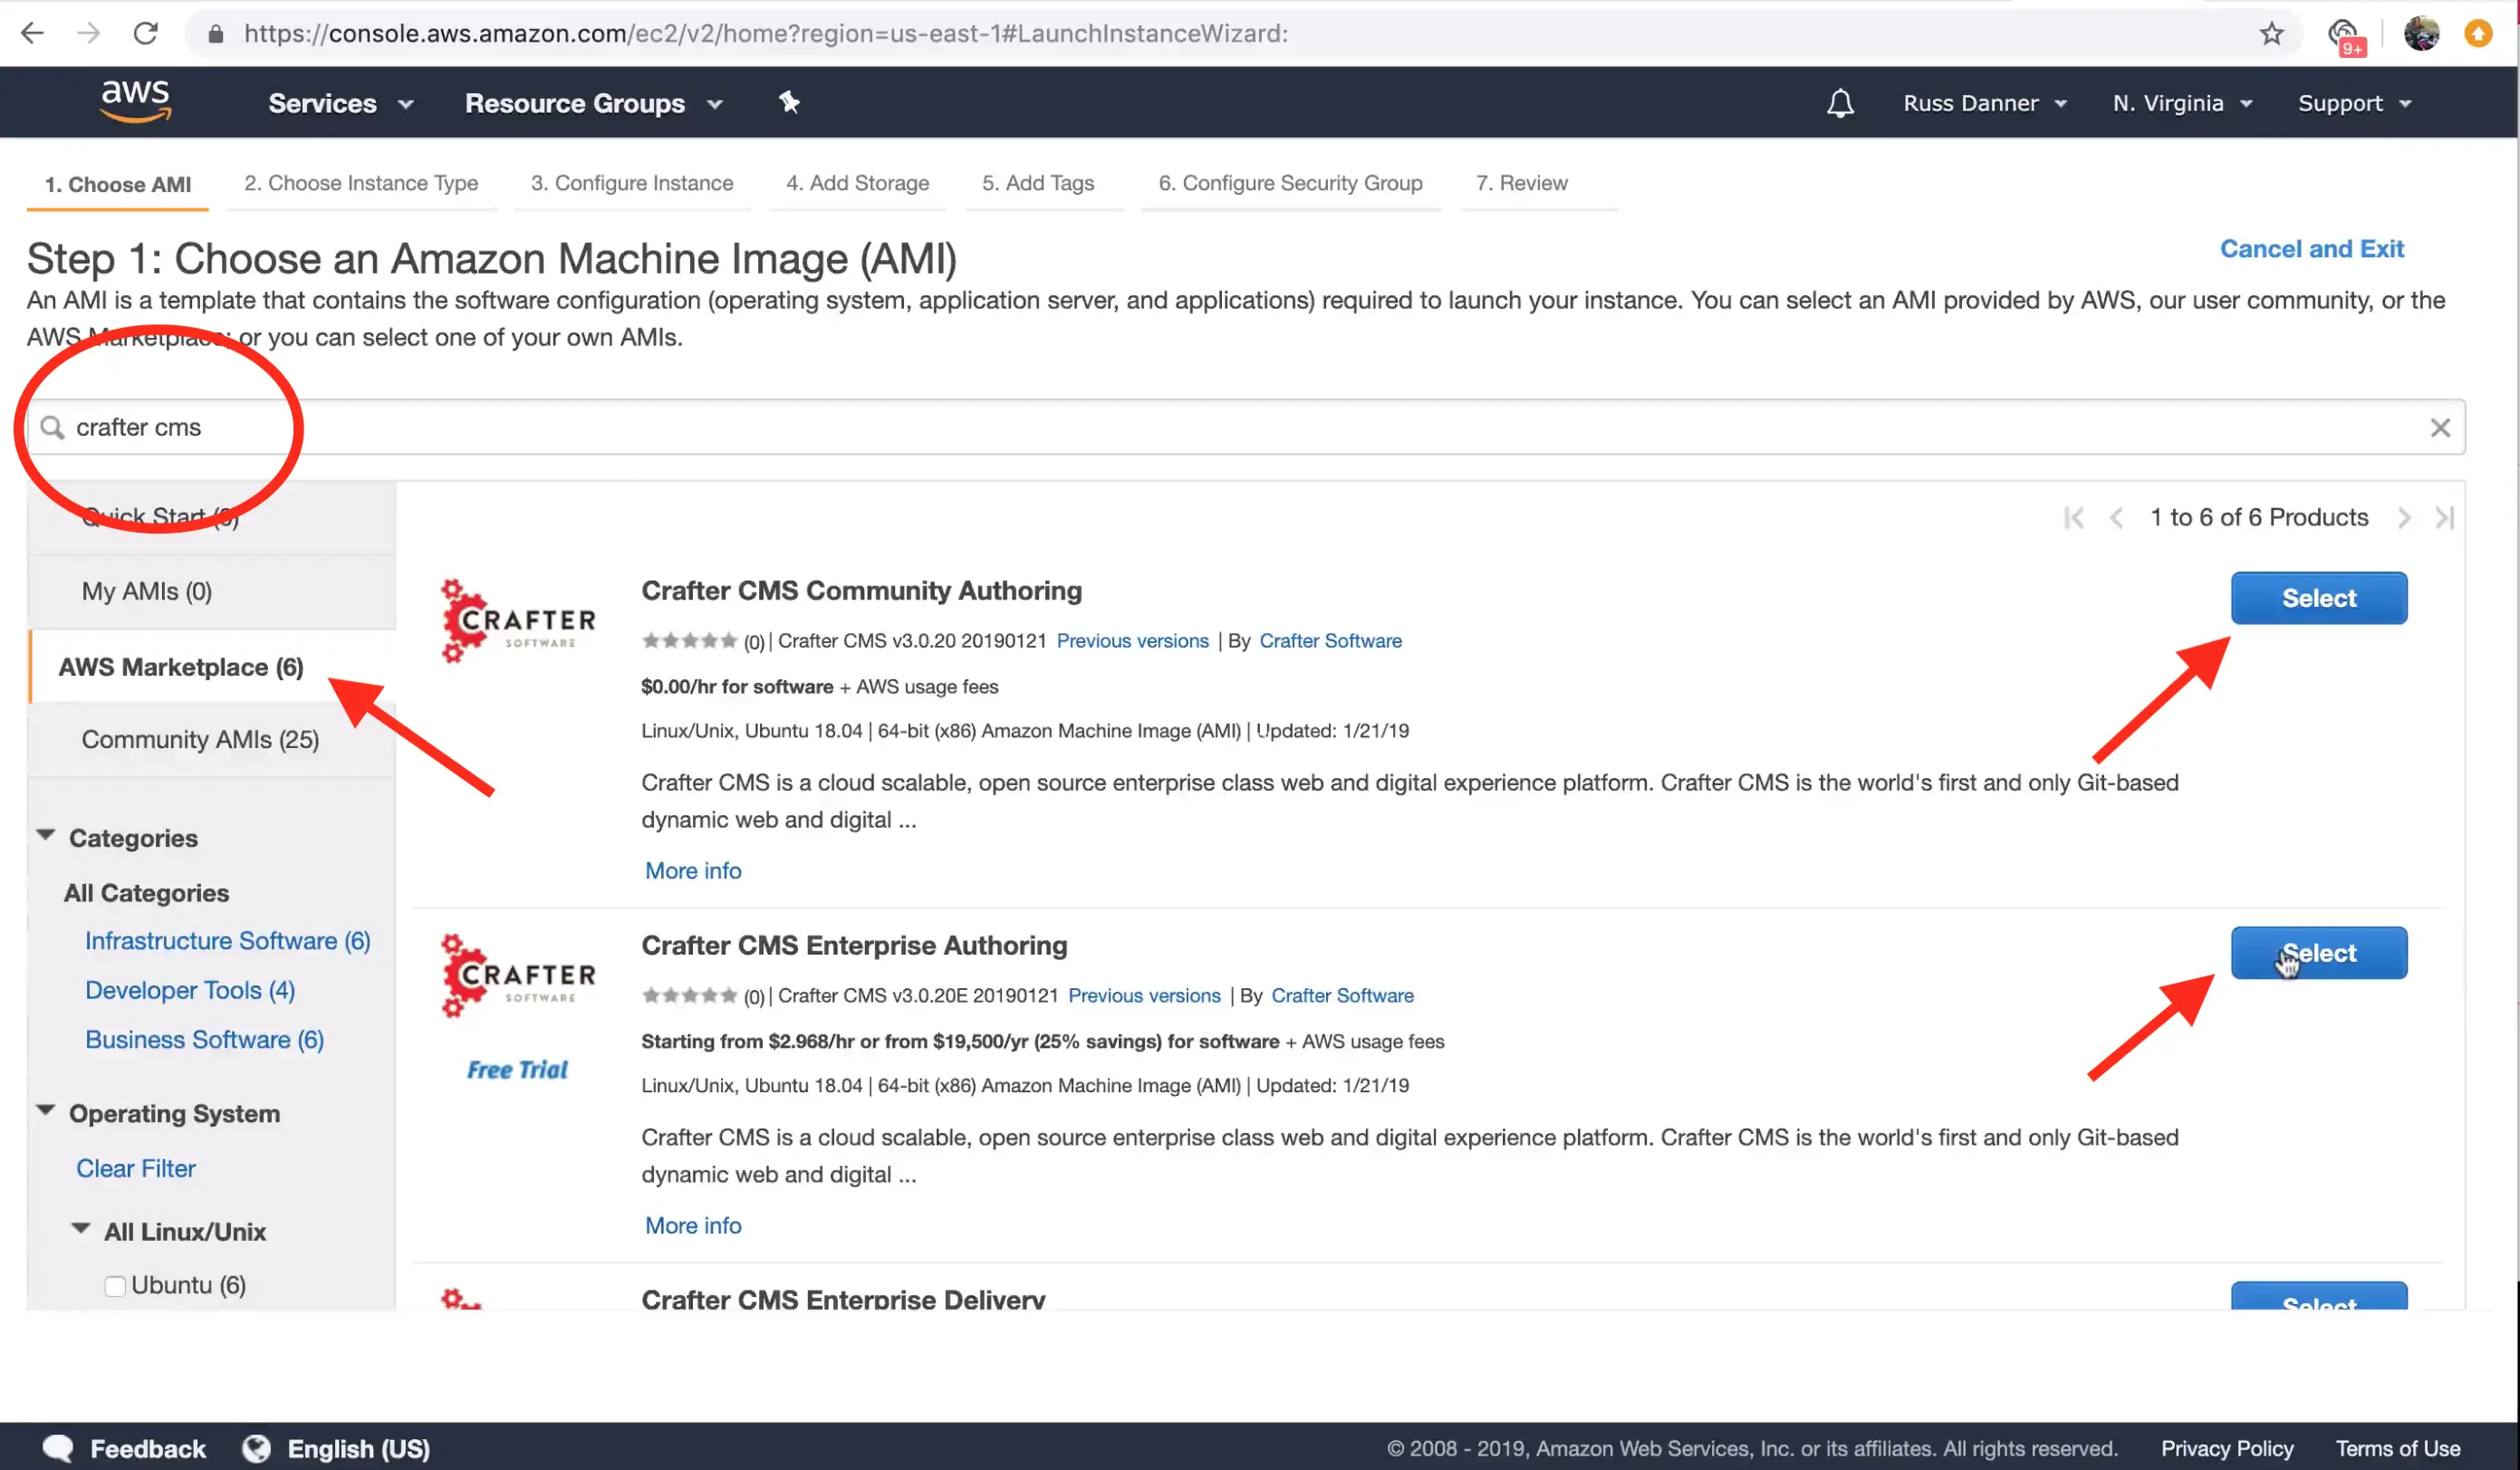
You can find CrafterCMS Authoring by entering the keywords "CrafterCMS Authoring." in the search box as shown below. You will find a number of options in the search results.
- CrafterCMS Community Authoring is our open source version
- CrafterCMS Enterprise Authoring is our supported enterprise version
Click "Select" on the AMI type you want to use and then follow the launch instance/configuration wizard to determine the sizing and networking details for your instance. Please note, we recommend compute optimized / "C-class" machines for best results with typical production use.
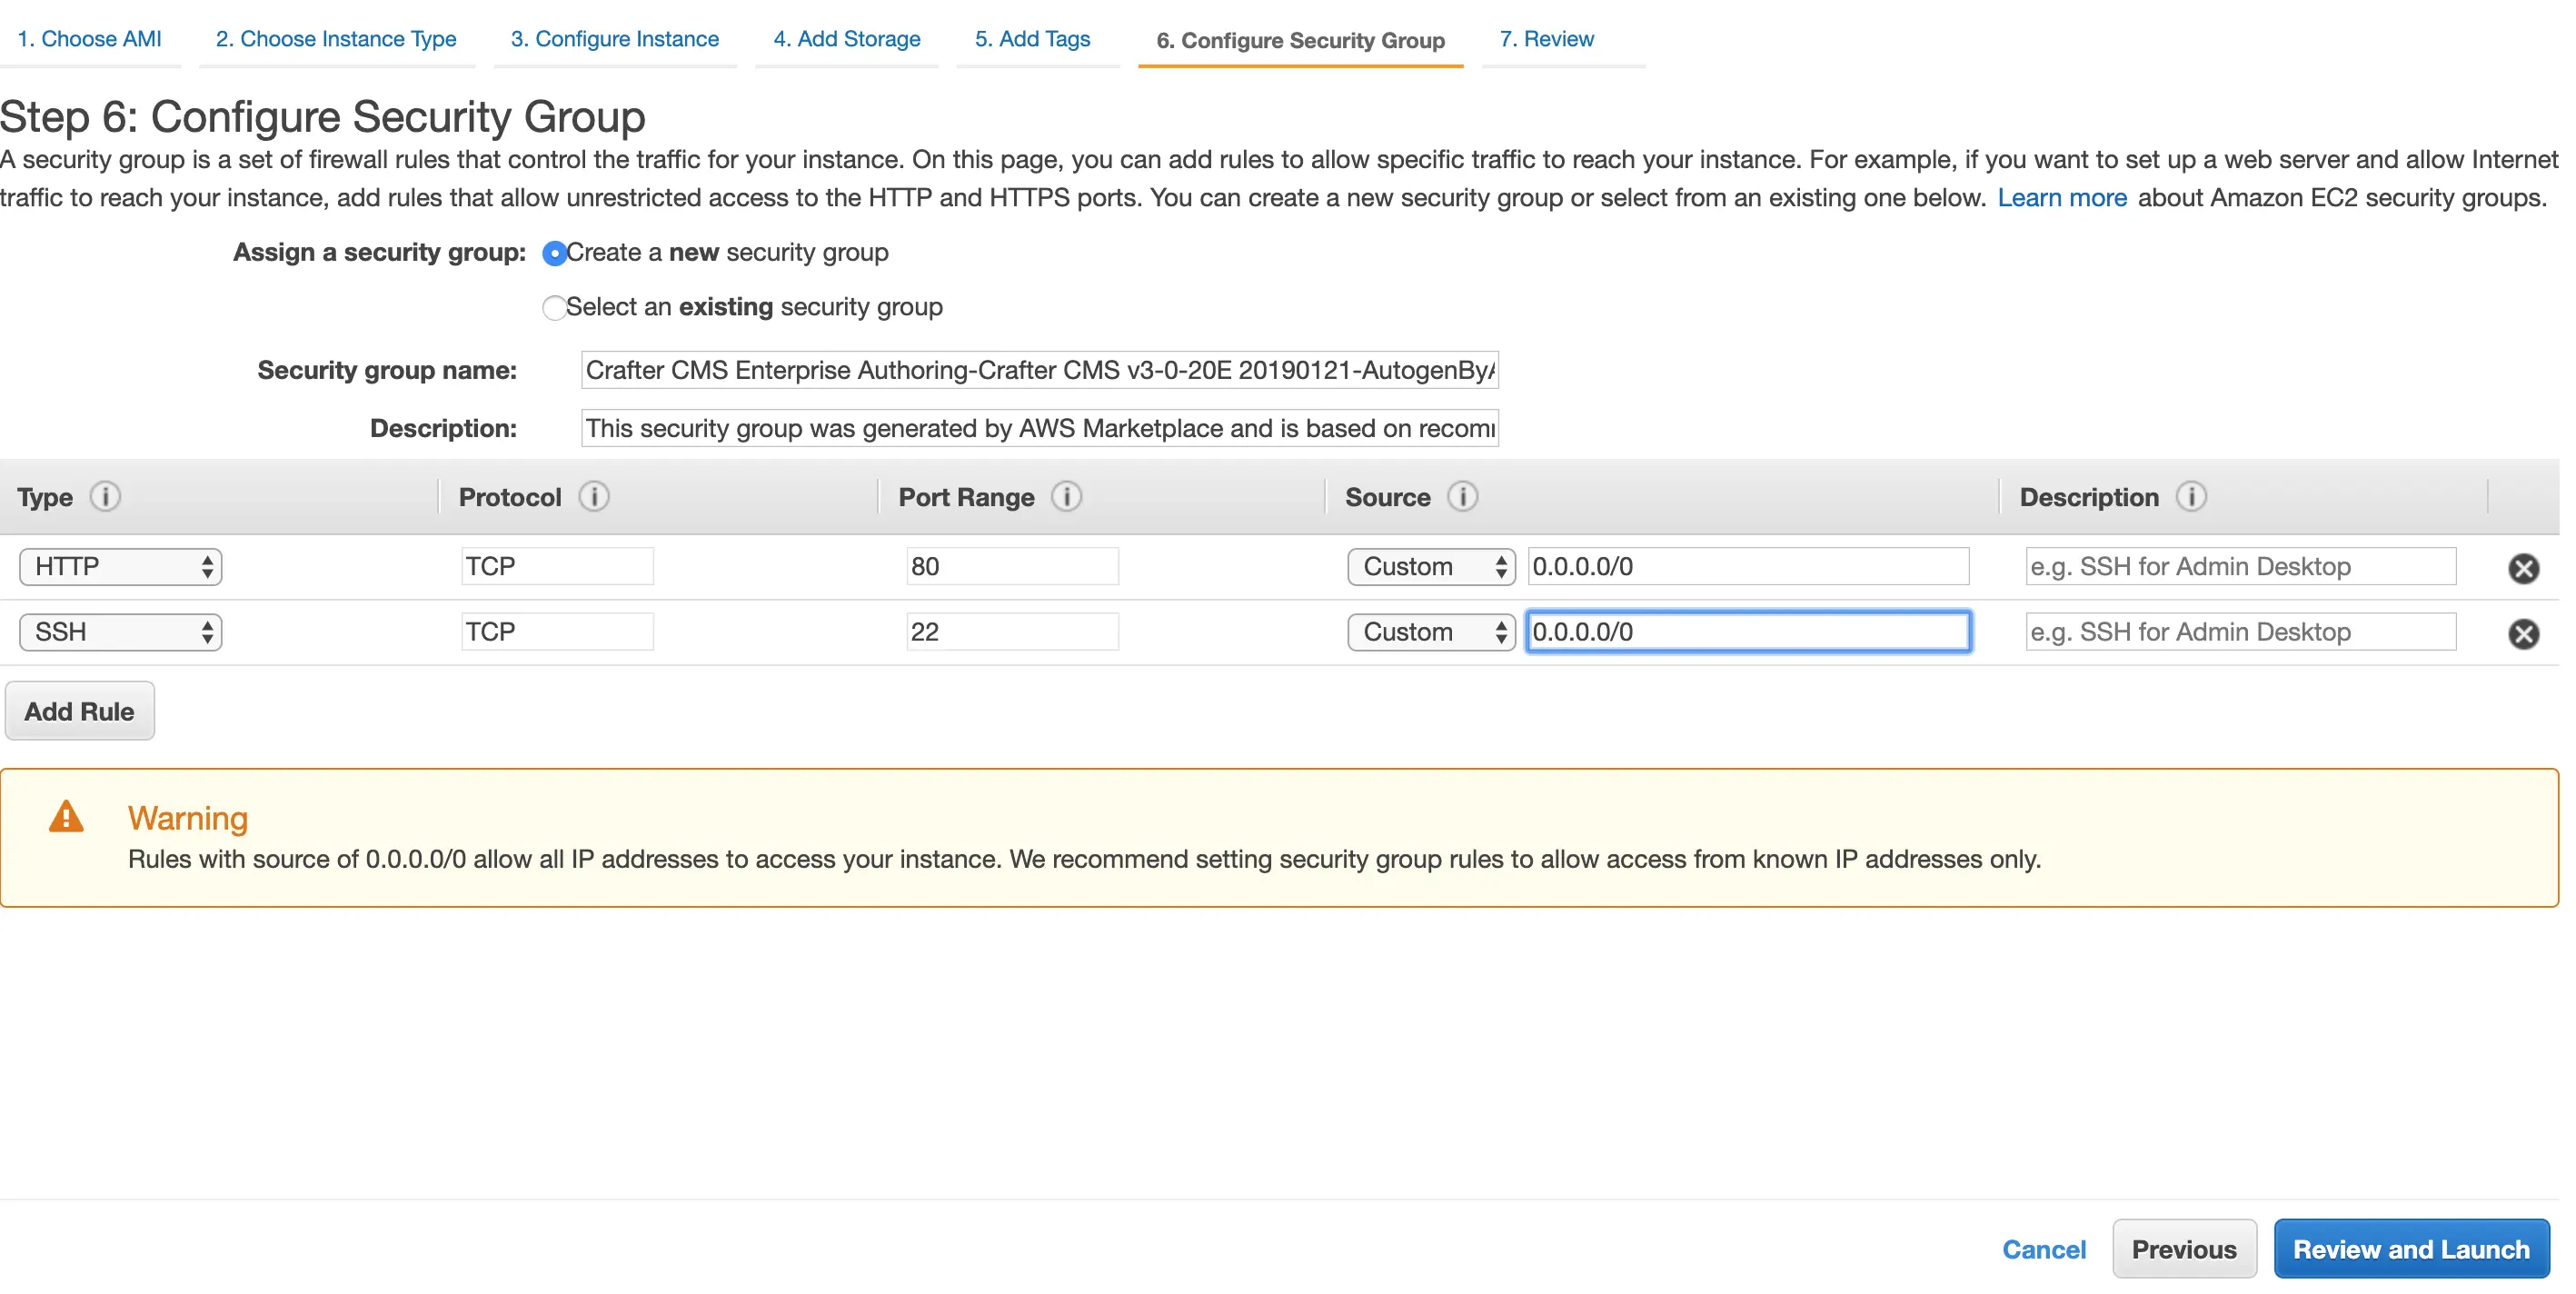
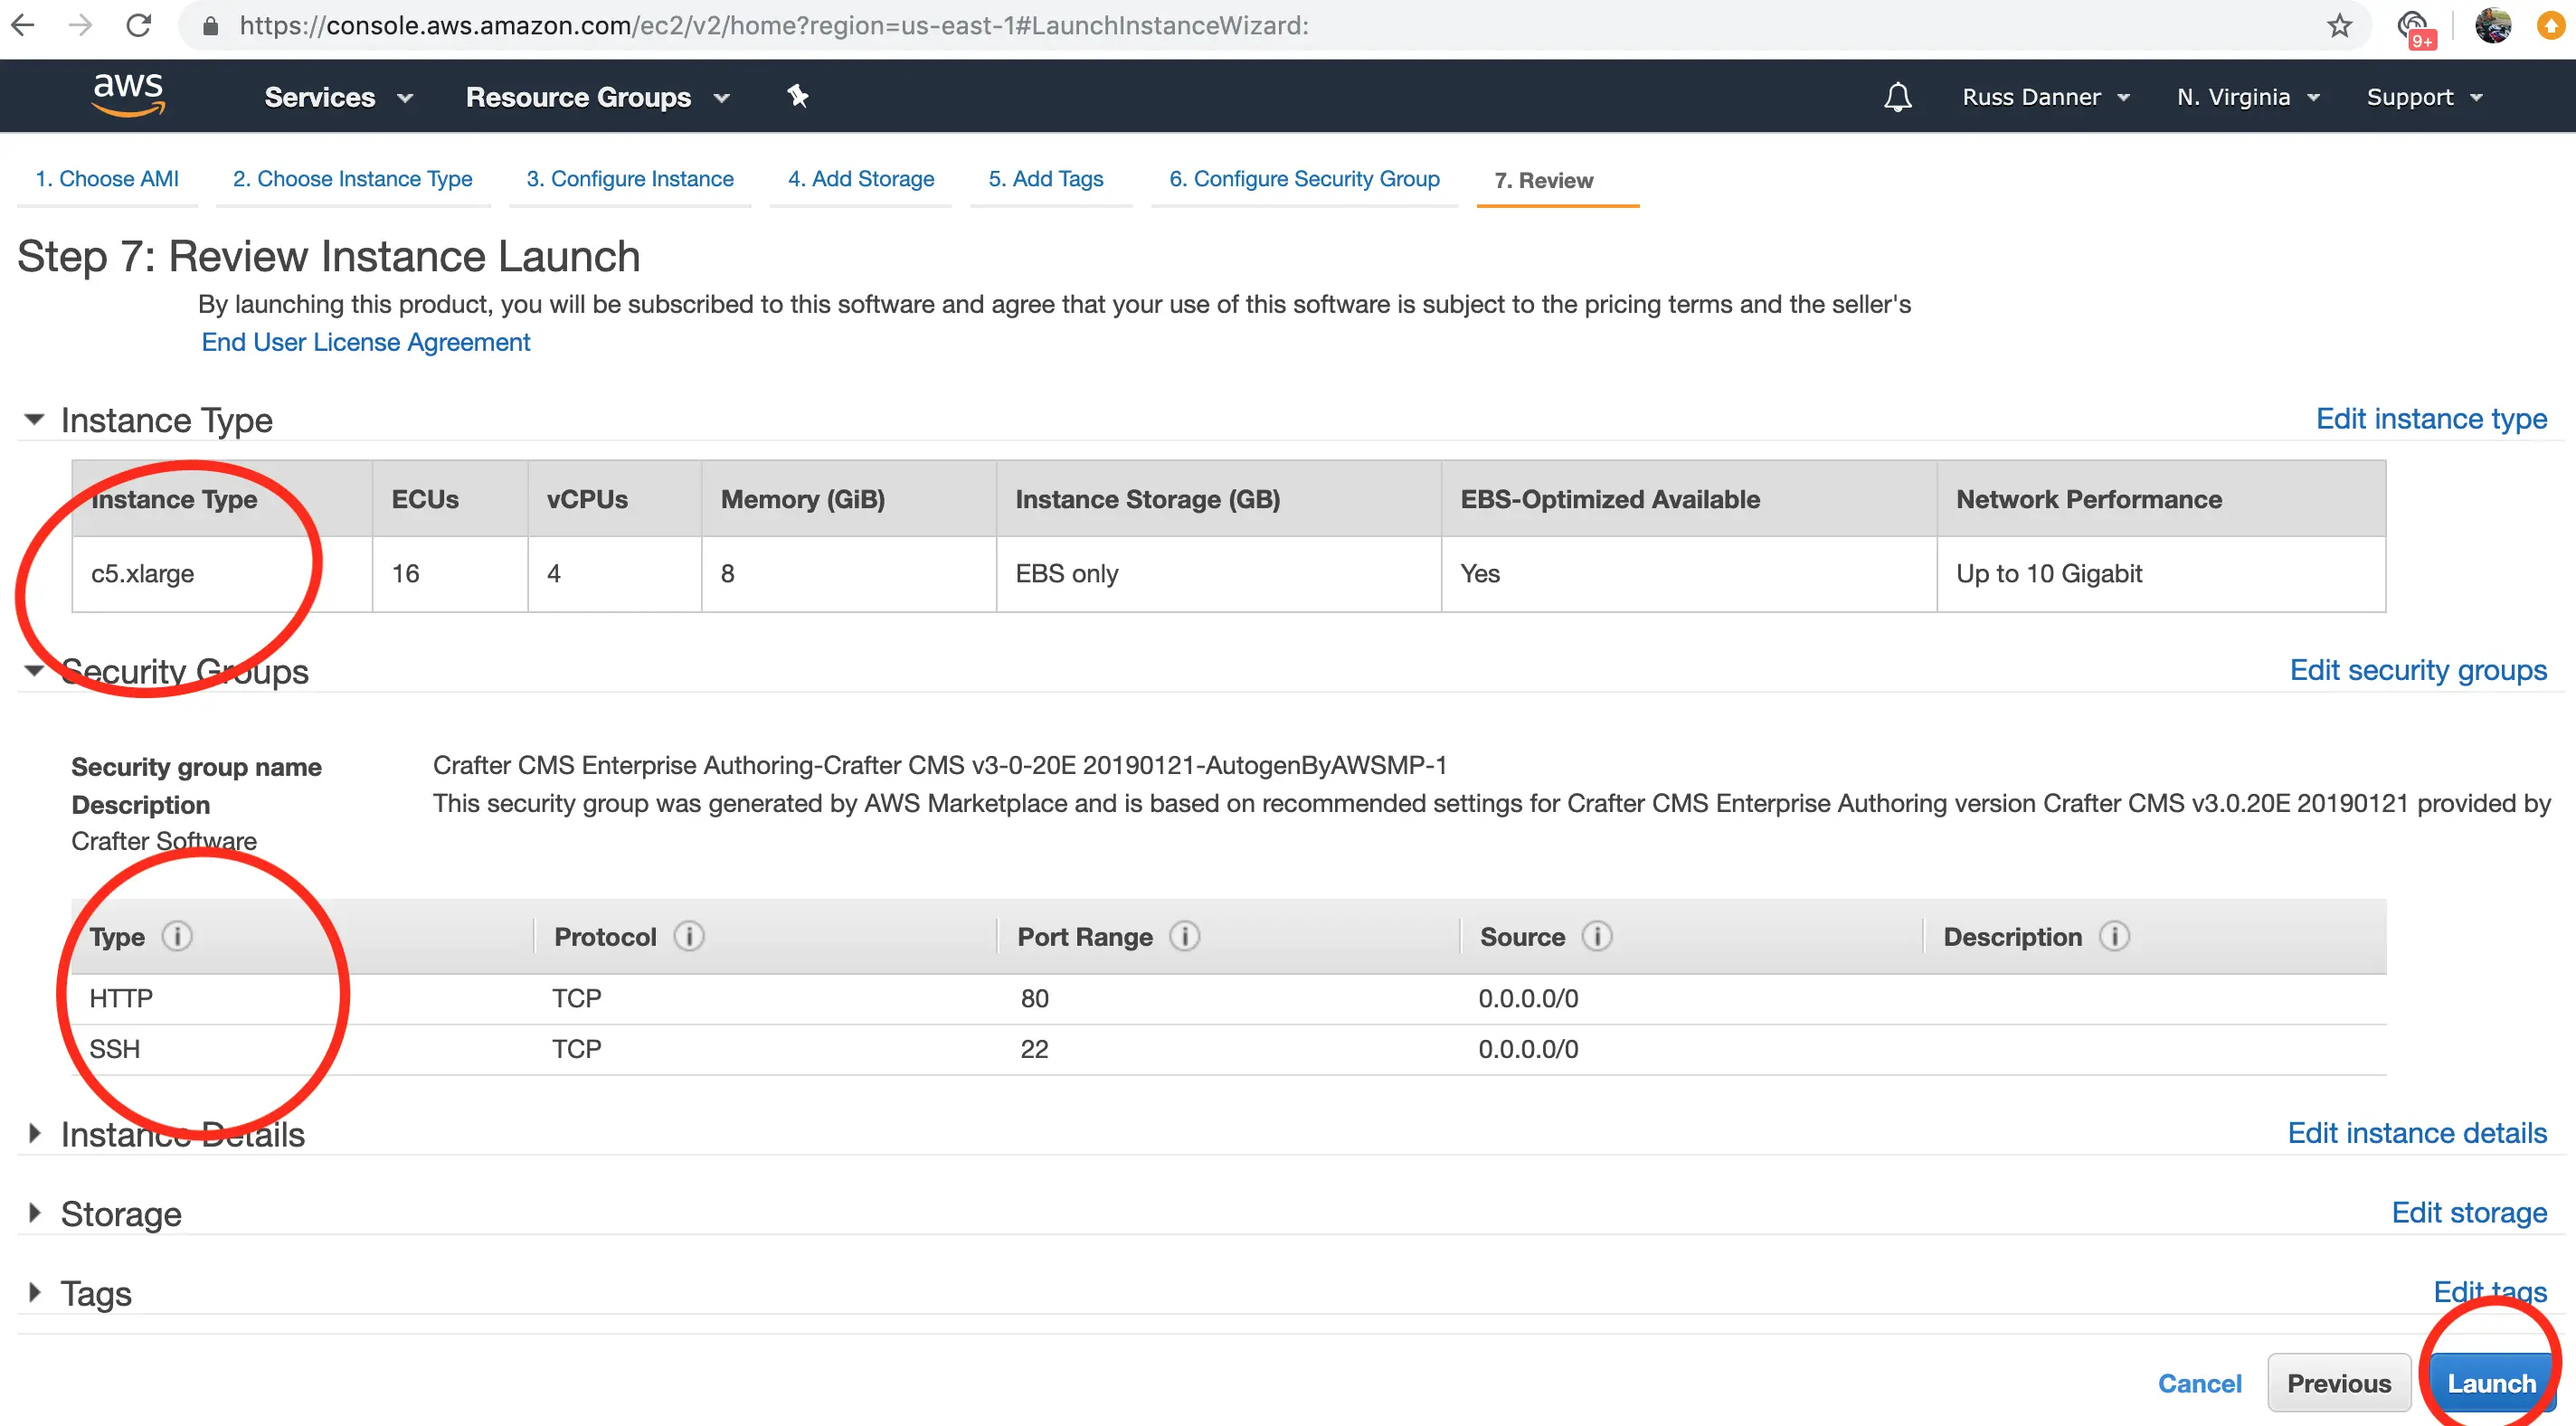
The launch instance wizard gives you the ability to tweak your instance's configuration details. In the next step we will connect to the machine with SSH via a terminal/console inorder to acquire the administrators initial login password for the Crafter Studio web application. You will need to add SSH to your inbound security settings for the instance to complete the next step and acquire the password. To do so, click the "Configure Security Group" tab.
To add the rule for SSH, click the "Inbound traffic" tab and then "Add Rule" to configure SSH. You can restrict the inbound traffic for SSH in the source column. To allow SSH from anywhere you can enter a CIDR of 0.0.0.0/0. Use the ports and IP masks/policies that align with your needs.
Once your have added SSH access and made any other tweaks you feel are necessary to your instance's configuration, click the "Review" tab and then click the "Launch." button.
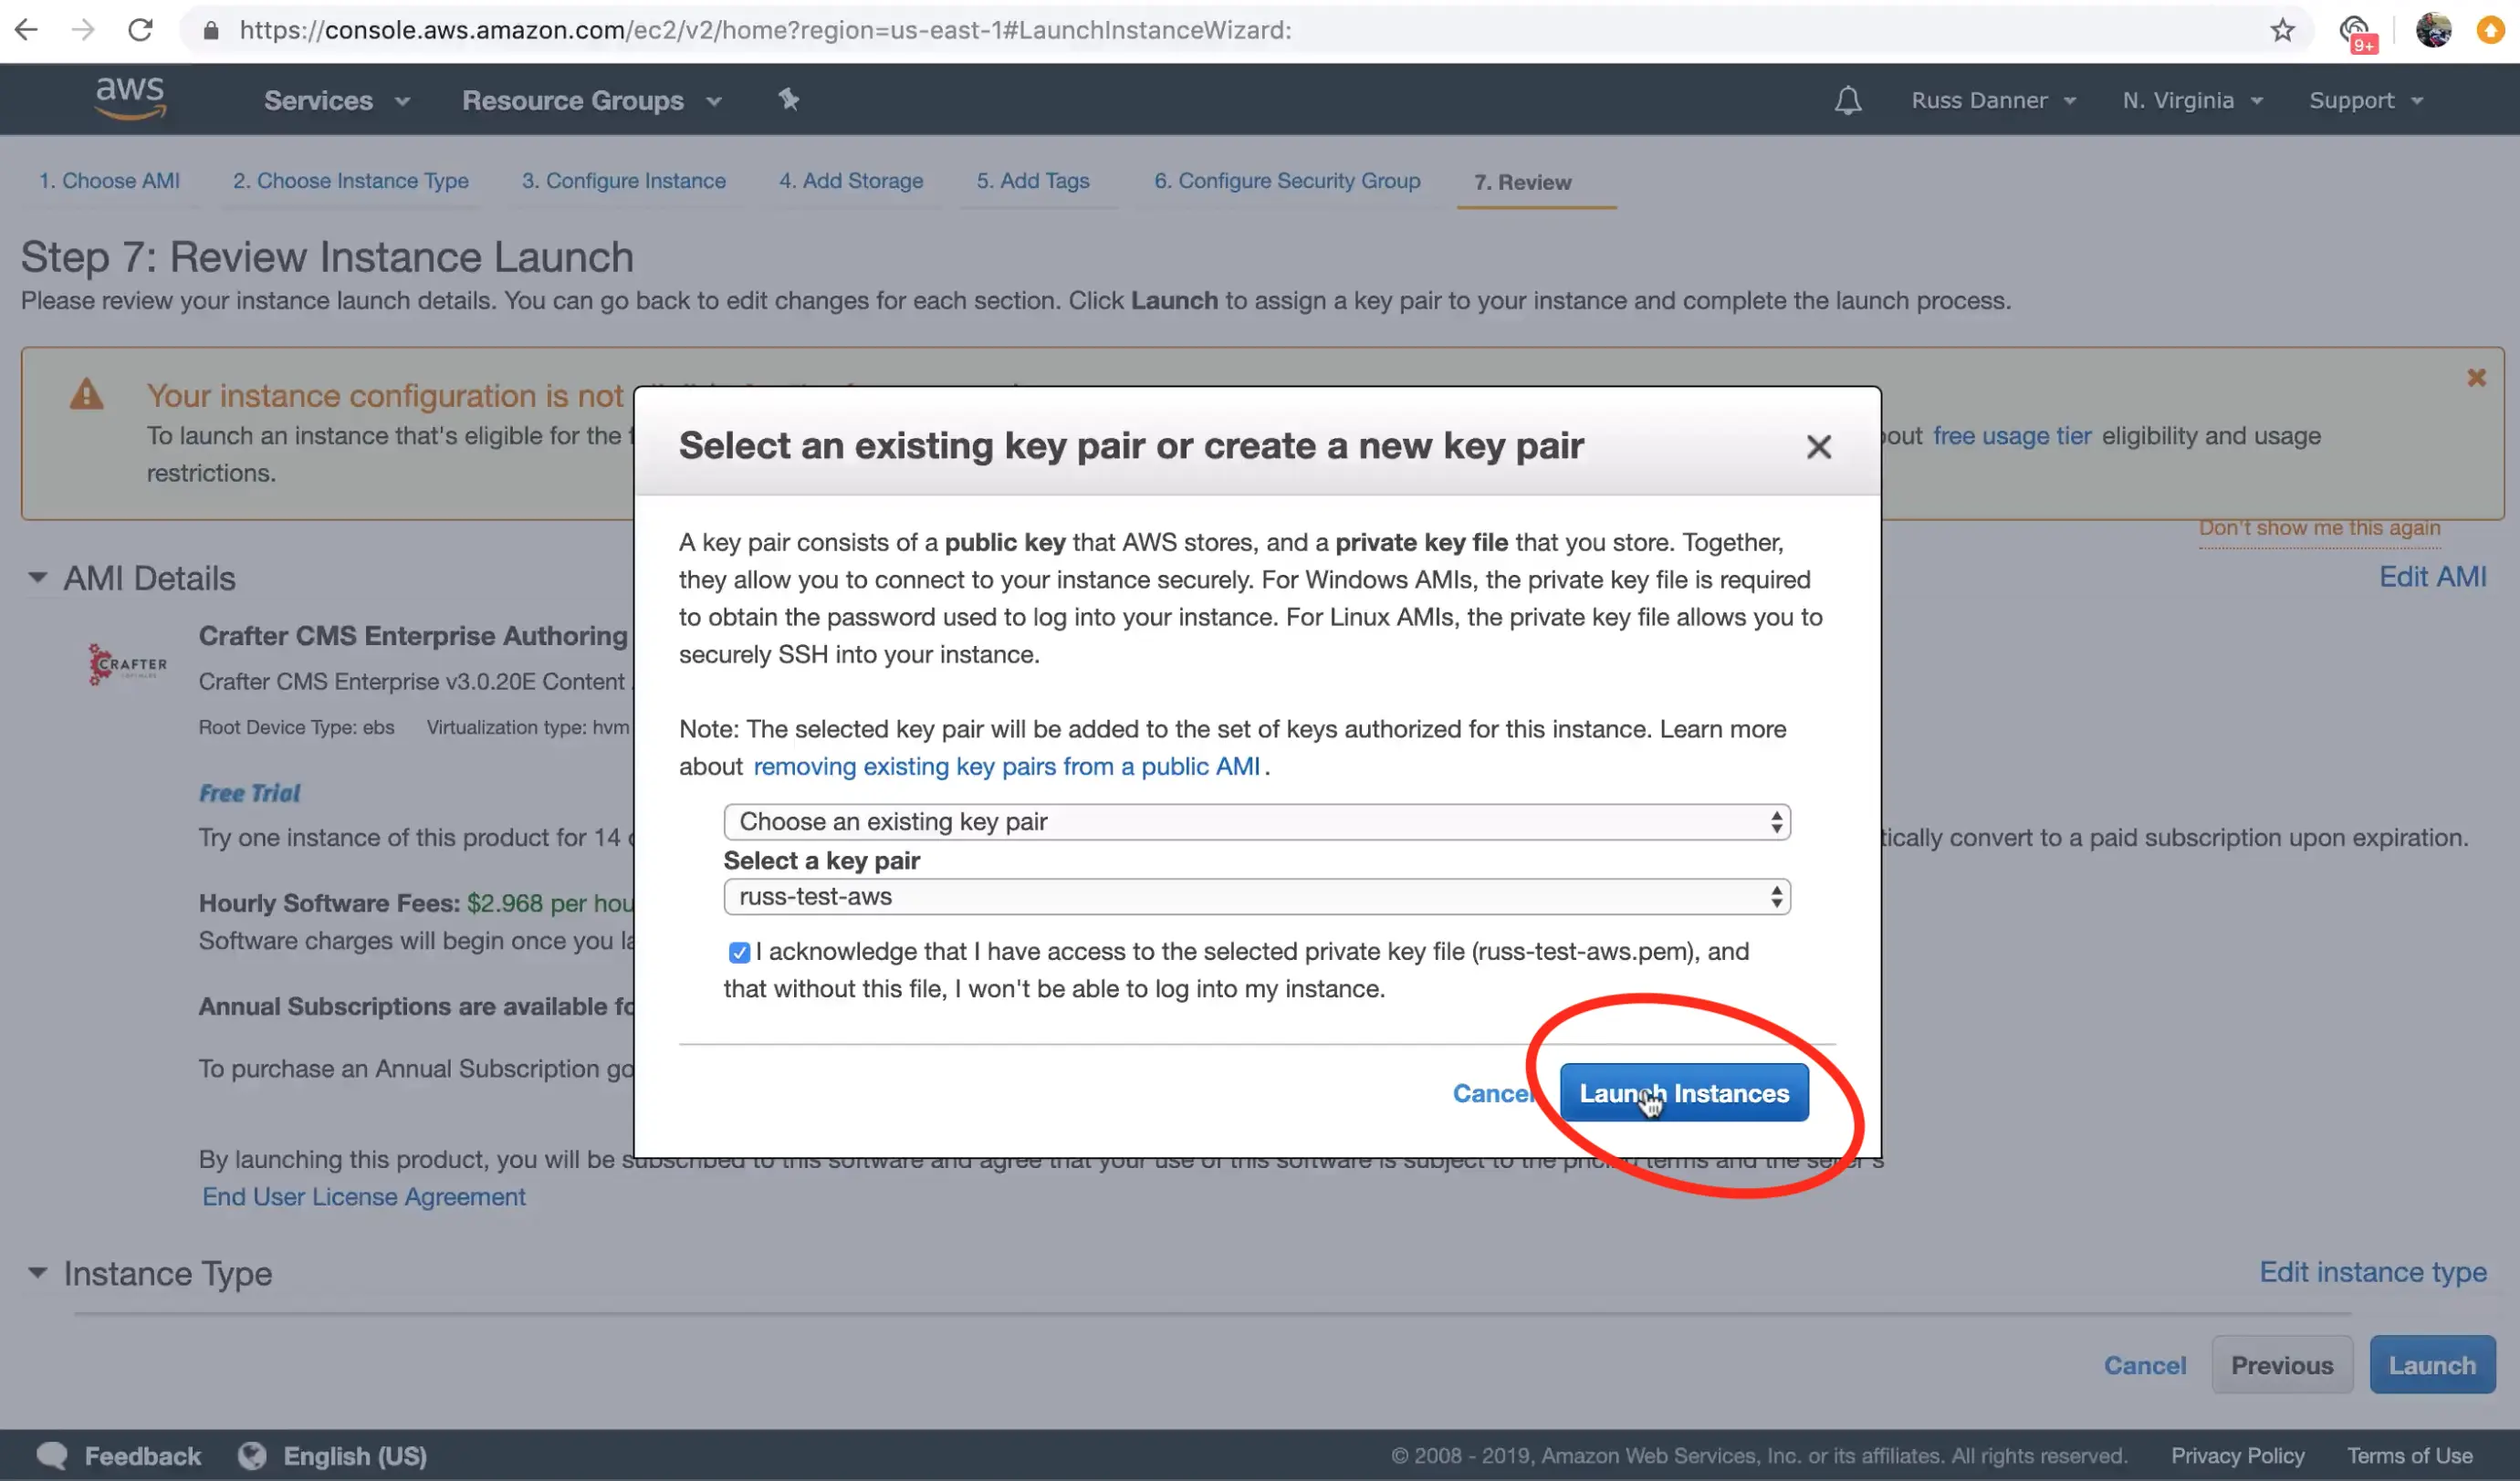
After clicking "Launch", AWS will request that you select a public key for administrative console access to the machine. You will need access to this key in the next step in order to retrieve the administrator's password for Crafter Studio. Create or choose an existing key and click "Launch Instances"
Once you click "Launch instances" AWS will start and initialize the instance. This may take a minute or two.
Step 2: Access the Crafter Studio login screen
In this step we want to prove that the application is up and running now that our instance has started and initialized fully. To do this, we're simply going to check that the application login screen shows up when we access it via a web browser.
To access the login screen open a web browser and navigate to http://DNS_NAME_OR_IP_ADDRESS/studio. 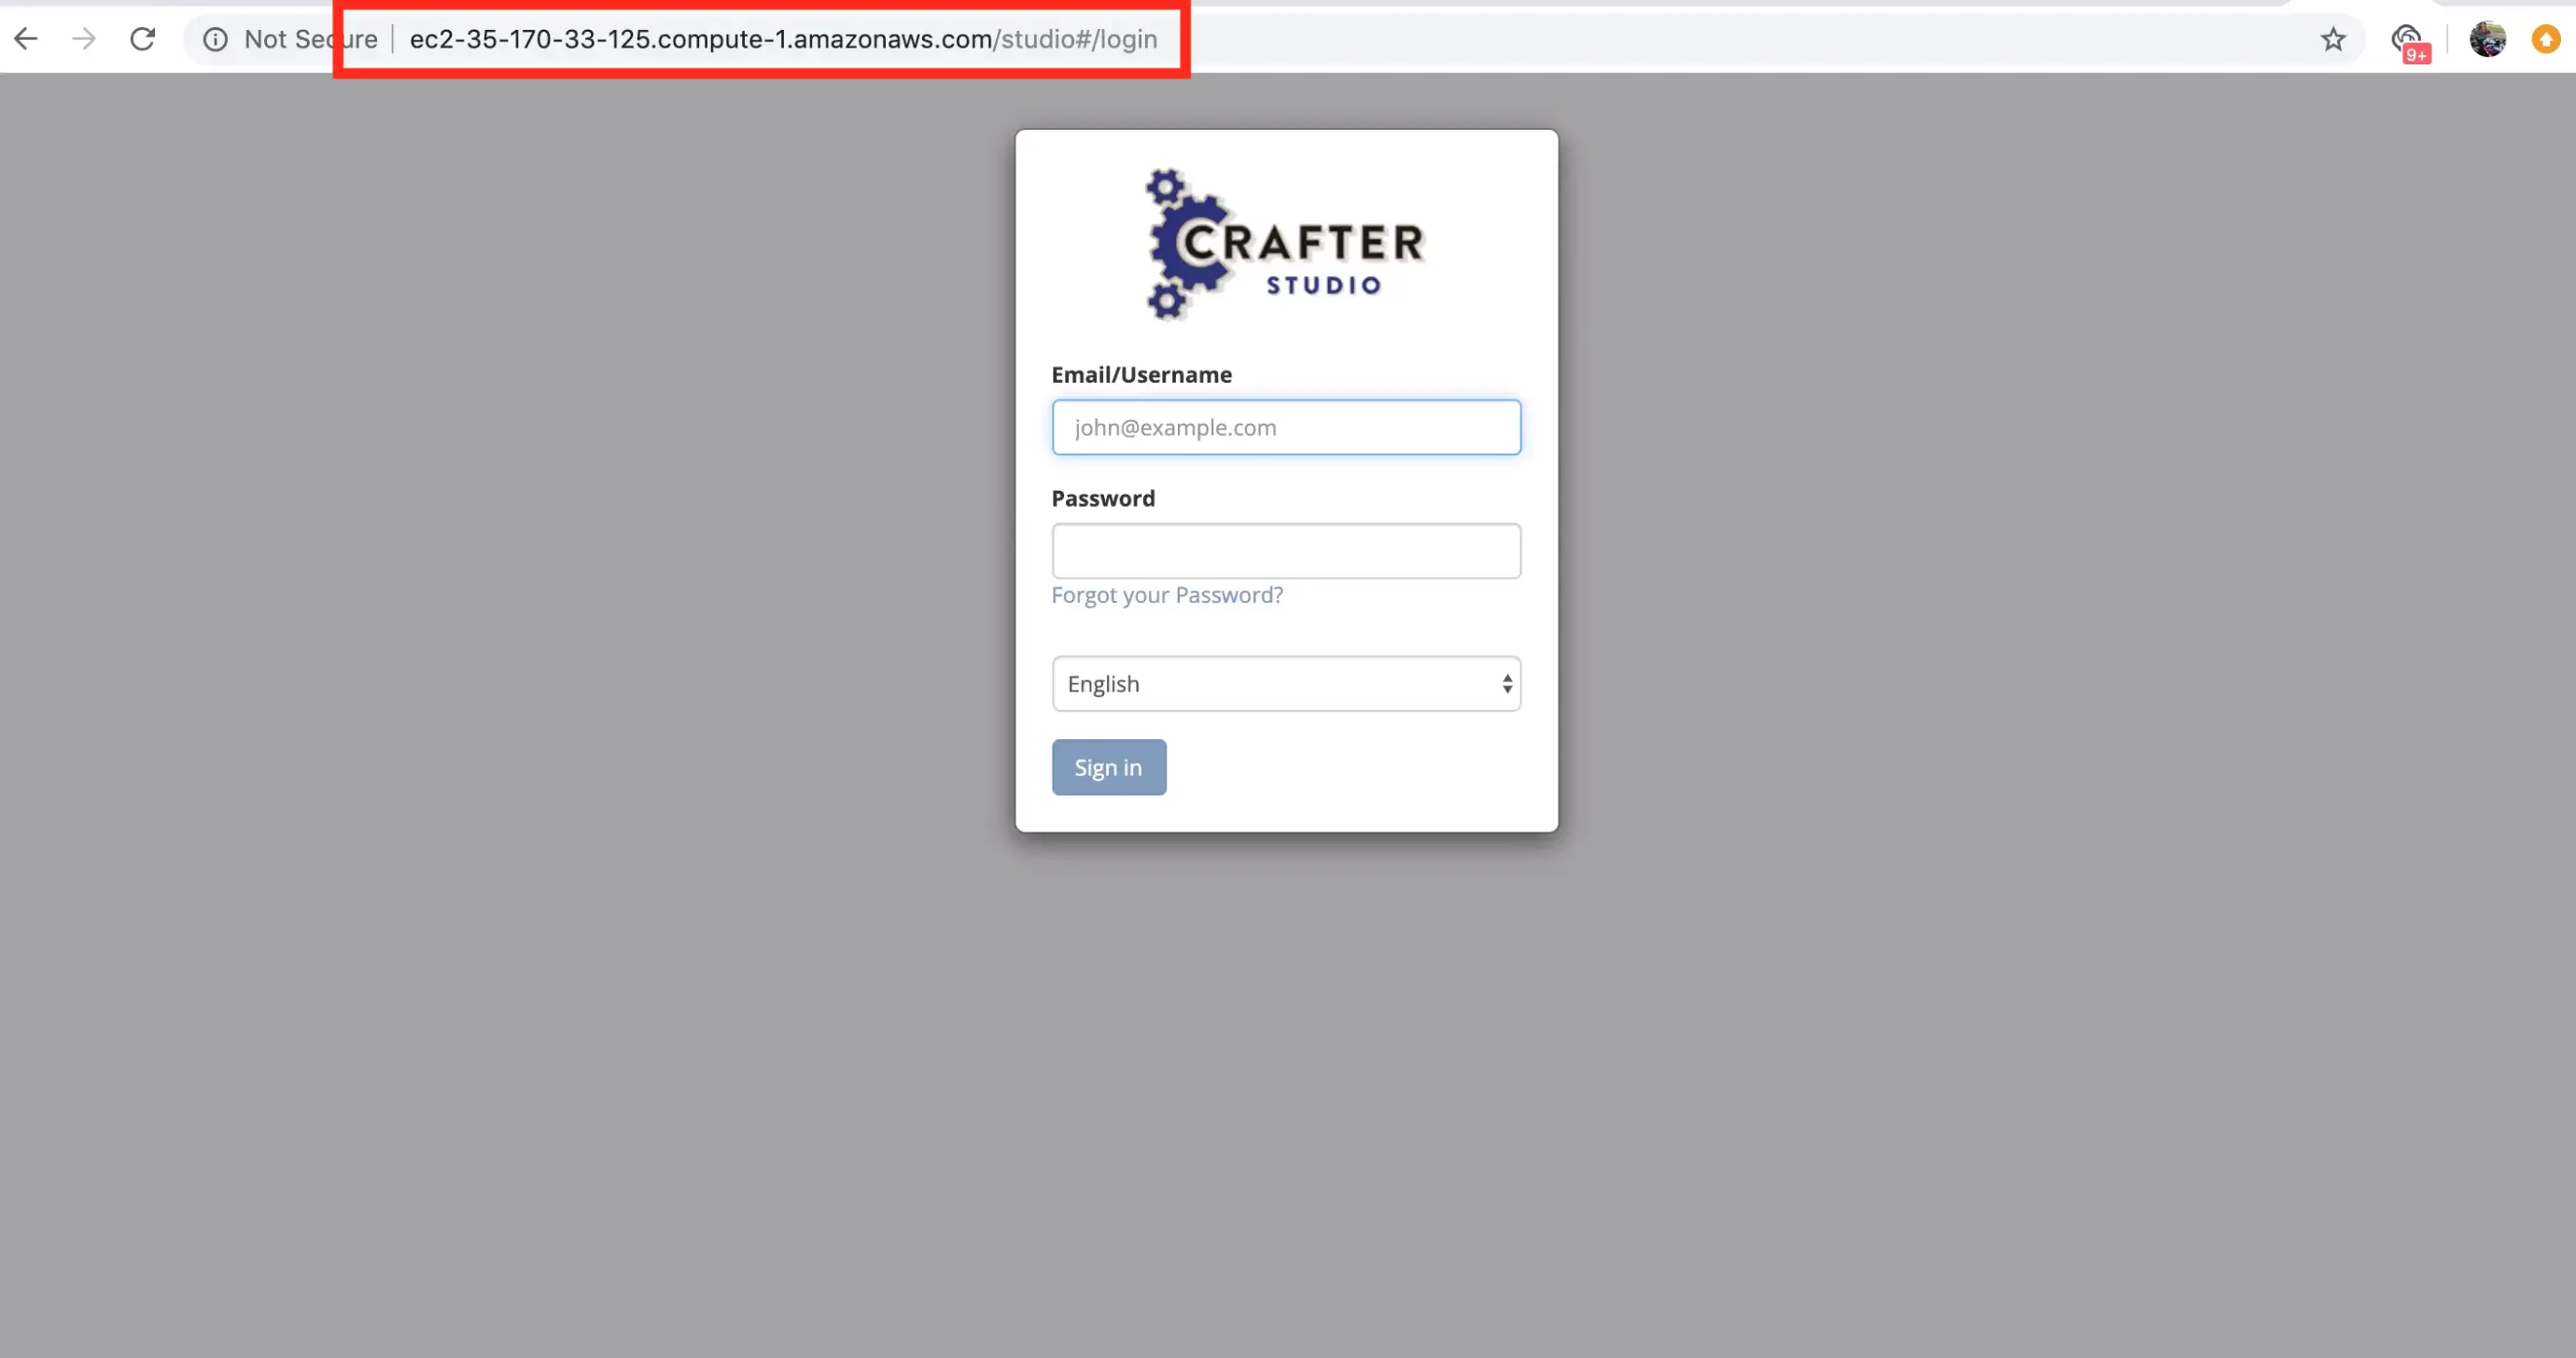
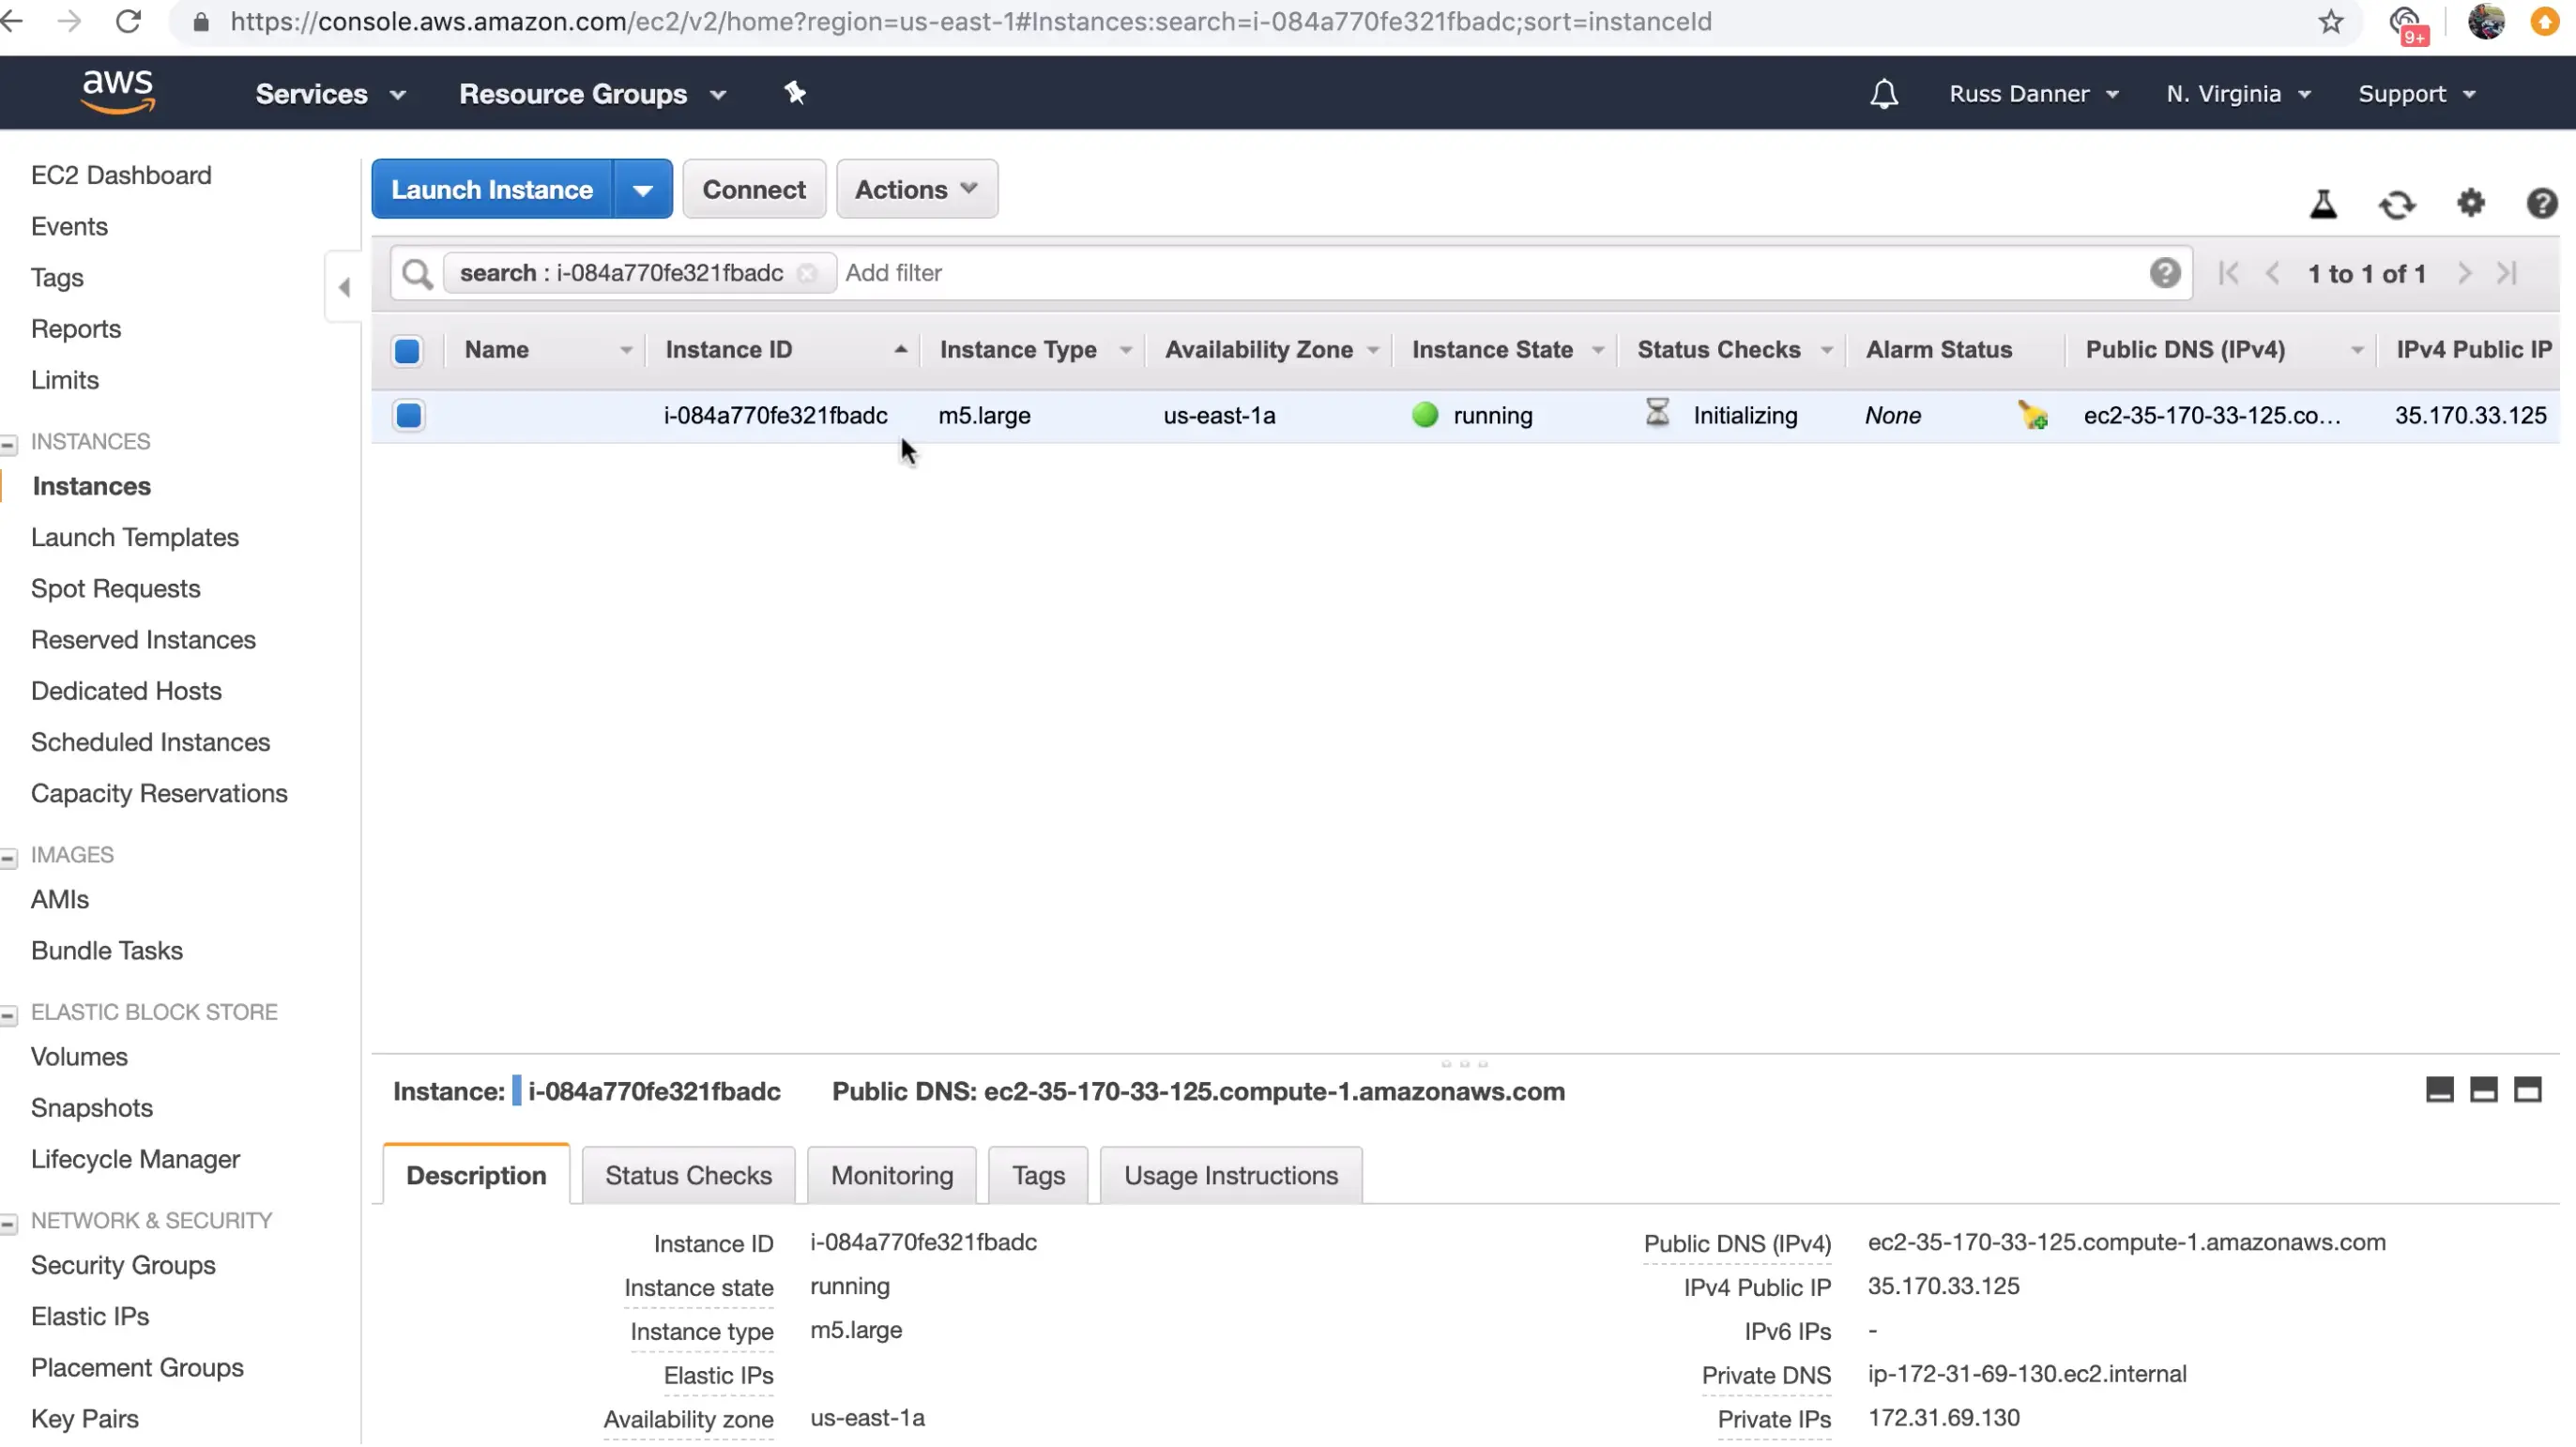
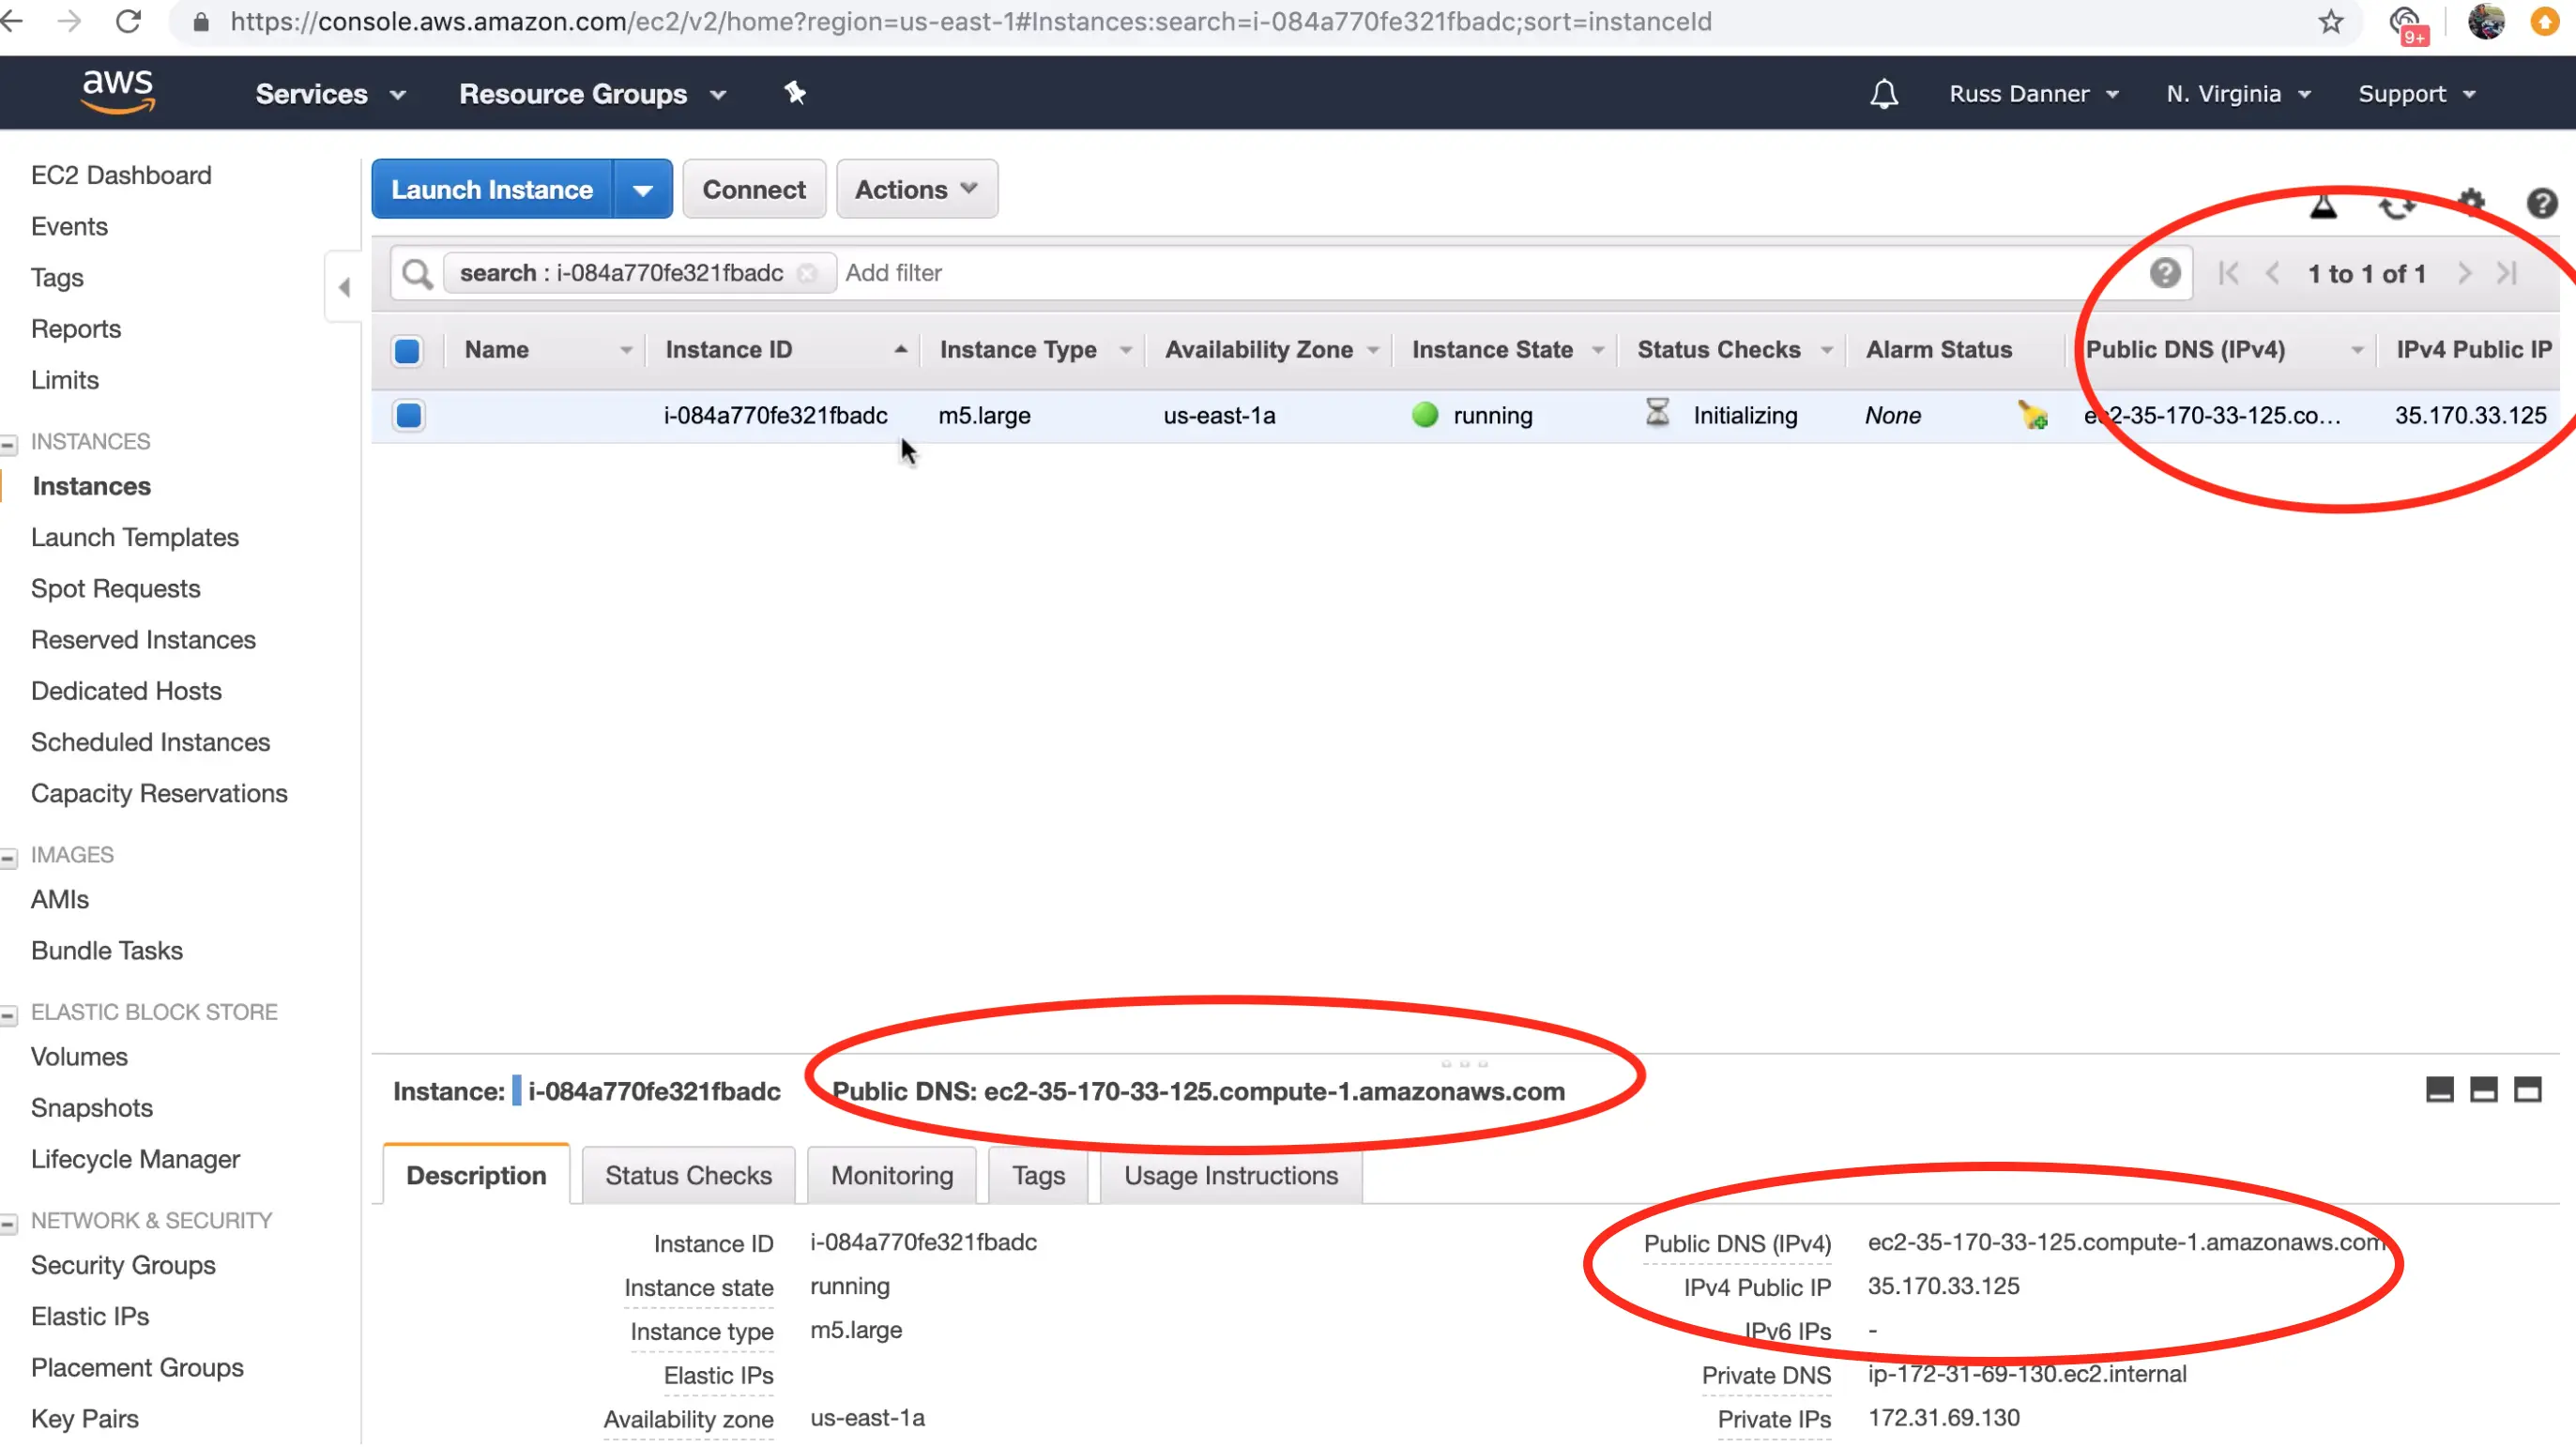
You can find the IP address and/or DNS name in several locations on your AWS administration console shown here:
Step 3: Acquire the Crafter Studio admin user's password
CrafterCMS randomly generates the admin user's password for Crafter Studio for each instance you launch. The password can be reset to anything you like after your initial login using the initial password. In this step we're going to log into the machine and acquire the password.
To acquire the initial password you must log in to the instance via SSH. Open a terminal and use the following command to sign in to the instance:
ssh -i ./PATH/TO/PEM/keys.pem ubuntu@IP-ADDRESS 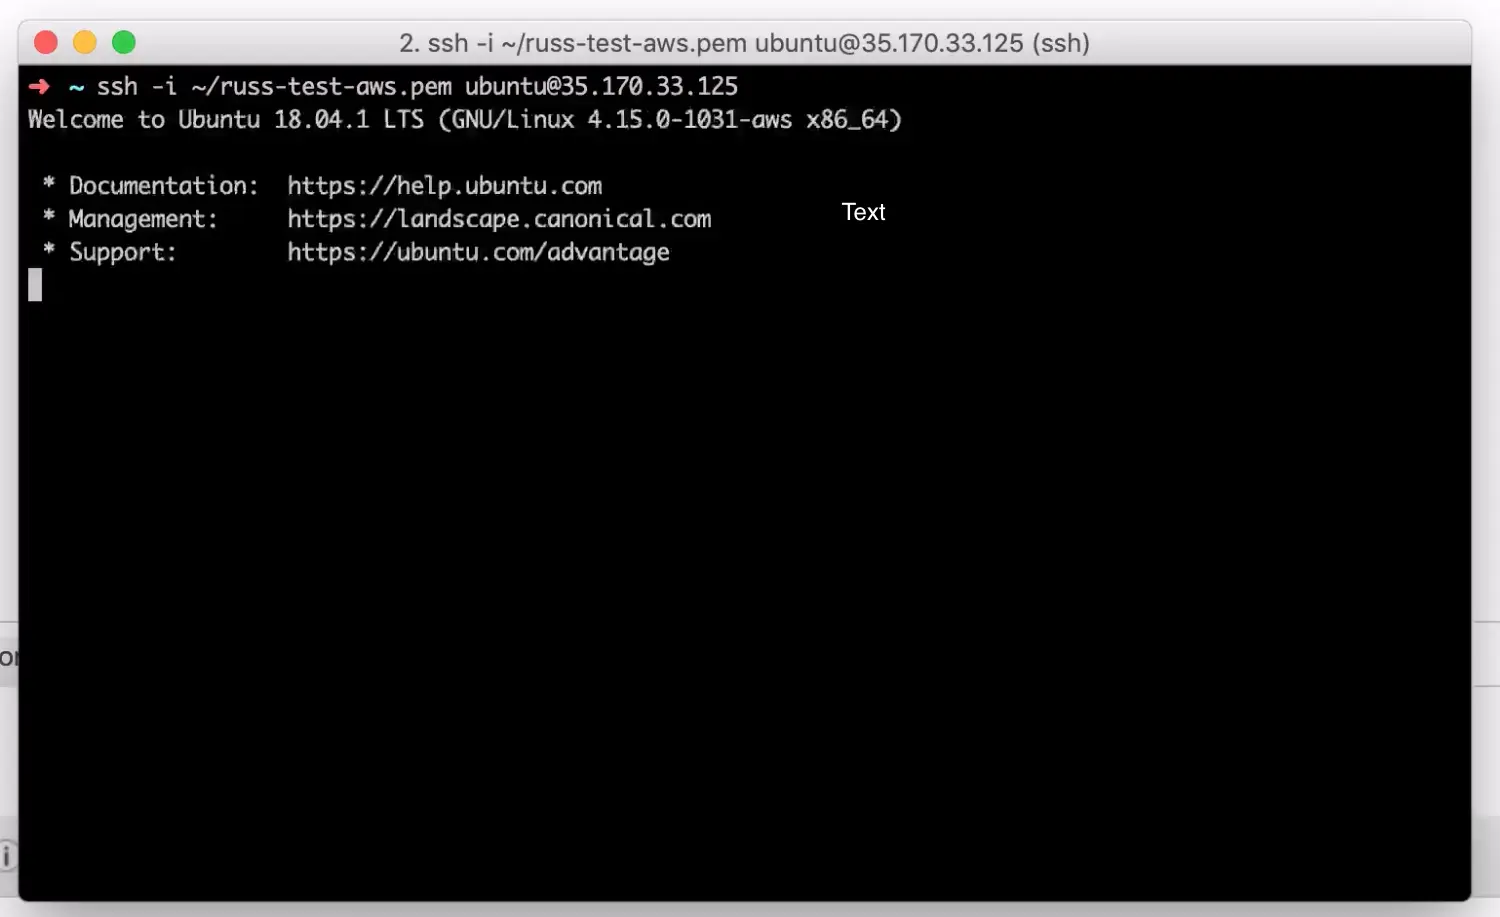
If SSH times out :
You have will need to double check your security policies for the instance to make sure you are using the correct SSH port and that the firewall will accept your traffic from your network. To check these configurations, scroll right and click the"Security Settings" column for your instance. Follow the steps outlined in step 1 to check or configure your security policies. Once the rule has been added/updated or you have specified the non-standard port (22) in your SSH command (add -p PORT_NUMBER to your command) you will be able to log in.
To get the initial administrative password:
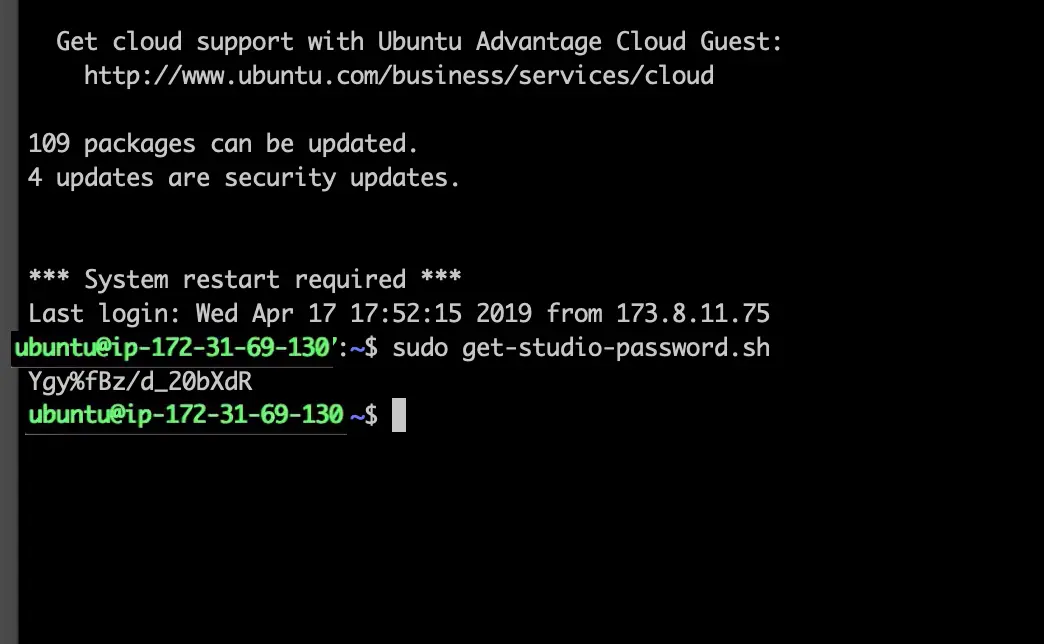
Once logged in you will execute a simple script to acquire the password. To do so, from the console prompt of your instance you can execute the following:
sudo get-studio-password.sh
The password will print out in the console. Copy this password into your clipboard and proceed to the next step.
Step 4: Sign into Crafter Studio
Now that we have the randomly generated admin password for Crafter Studio we can sign in to the application.
In your web browser, navigate to http://DNS_NAME/studio and then enter admin as the Email/Username, paste the password you acquired from Step 3 then click "Sign In."
Step 4: Setup complete
Welcome to Crafter Studio! Your initial installation and setup is complete.
From here you can create sites, administer users/group and manage your admin user's account settings.
Follow this guide to create your first website or headless CMS project: https://docs.craftercms.org/en/3.0/getting-started/your-first-website.html
Follow this guide to setup a Delivery instance of CrafterCMS on AWS: https://craftercms.org/blog/2019/04/setup-crafter-cms-delivery-using-crafters-aws-ami